Log-in with Microsoft
Logging into a website with Microsoft Entra ID can be more secure and convenient than logging into the website with a built-in “local” Cosmos account using an Email address.
To enable Microsoft authentication, you must have an Azure account. Next, using that account you need to “register" and application with Entra ID (formerly known as Azure Active Directory).
Please note: This describes how to do that step by step for both the Editor and the Publisher web applications.
1. Register the Application with Entra ID
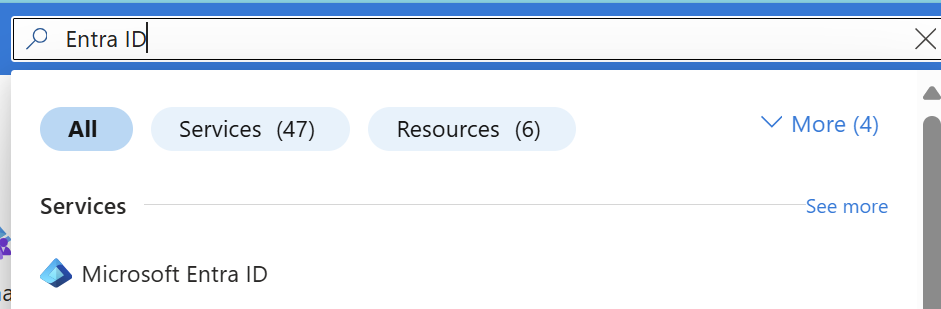
From the Azure Portal, search for “Entra ID” in the search bar located at the top of the page. Then select “Microsoft Entra ID.”
On the left side of the page click on “Manage” then “App registrations.” Now you will see a list of applications that are registered in your tenant. Find the “New registration” button near the top of the page and click on it.
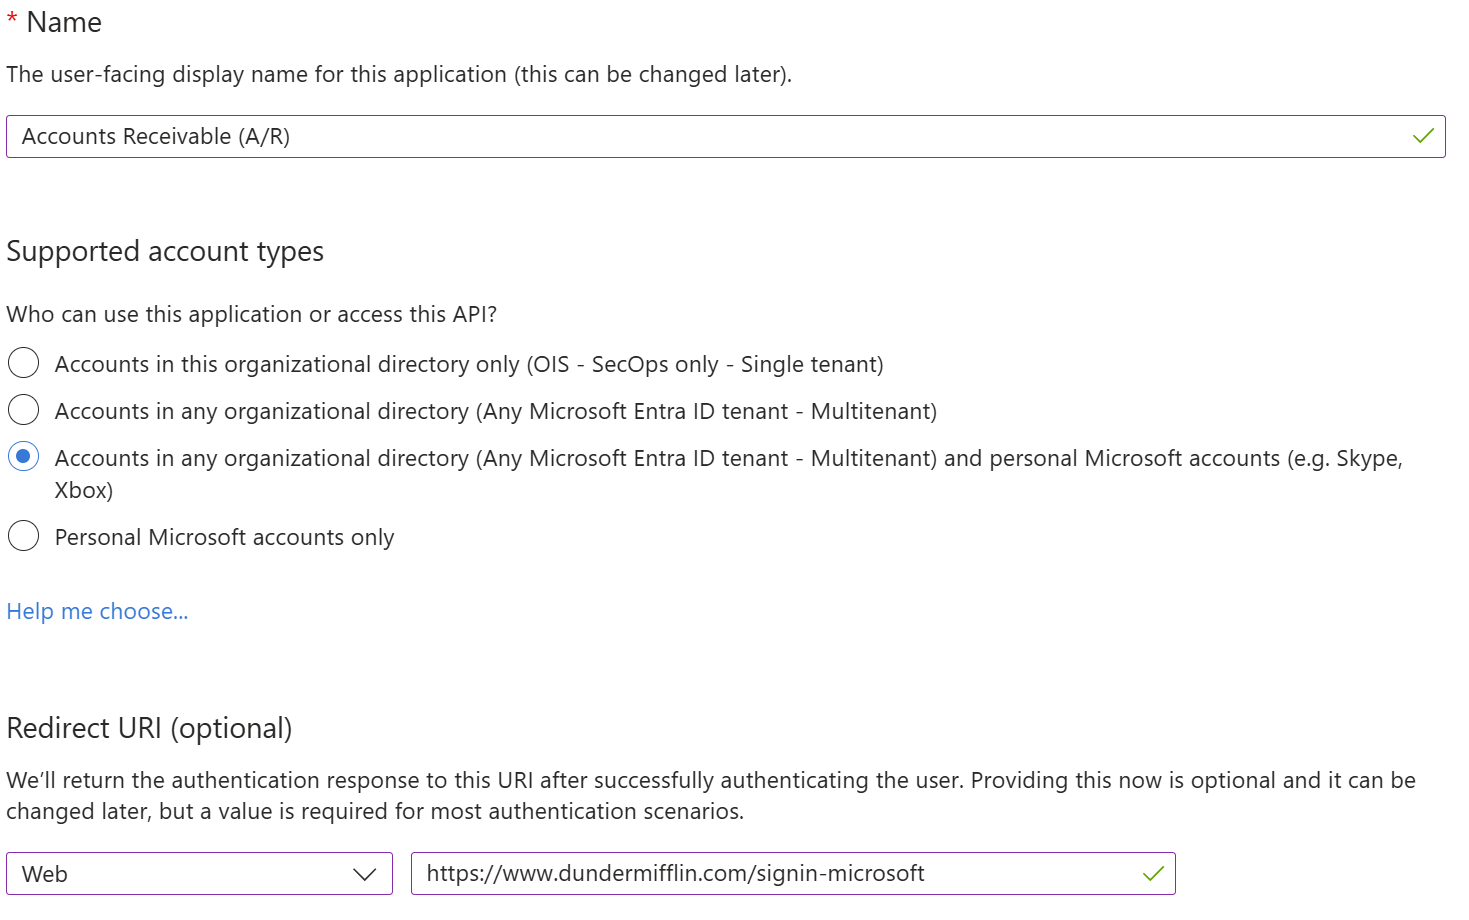
Now the registration dialog appears. Use a descriptive, user-friendly name for the name of your website or application. Under “Supported account types," select any of the last three choices.
Under “Redirect URI" select ”Web" in the drop down, next enter your website URL with the path “/signin-microsoft” (see example below). Double check everything, then click “Register” near the bottom of the page. This will bring up the Registered App editor.
Scroll down the page and make sure “ID tokens (used for implicit and hybrid flows)” is checked.

2. Record Application Information
Before proceeding to the next step, you must acquire your application (client) ID, client secret, and, if you selected a "single tenant" account type previously, the tenant ID. Here are the instructions to obtain each:
Application (client) ID
Near the top of the app editor page, you will see a value for the “Application (client) ID.” Copy and save this value for later.
Tenant ID (Single tenant only)
If you created a “Single tenant” application, you will need to record the “Tenant ID.” This can be found just below where you located the client ID.
Client Secret
Next, on the left edge of the page click on “Certificates and secrets” then find the “New client secret” button and click on it. A new dialog appears where you enter a description of what the secret is used for and how long until it expires--at which point you will have to generate a new secret. Click the “Add” button.

Now you will see the new randomly generated “Secret.” Select the value and save it for later. Be sure not to share this secret value with anyone.
At this point you should have to things saved:
- The Client ID, and
- The application secret.
Now continue on with the directions for setting up Log-in with Microsoft.
3. Environment Variables
Using the Azure Portal, navigate to your “Editor” web application. On the left edge menu expand “Settings” and click on “Environment variables.” Now add the following settings:
| Environment variable name | Value |
| MicrosoftOAuth__ClientId | This is the “Application (client) ID” recorded above. |
| MicrosoftOAuth__ClientSecret | The client secret recorded above goes here. |
| MicrosoftOAuth__TenantId | For single-tenant applications, create this variable and add the Tenant ID here. |
| MicrosoftOAuth__CallbackDomain | If your website is behind a proxy, or something like FrontDoor, the domain name of your website may be different that the web site itself. If this is the case, you may need to set this variable. An example value would be ‘www.mywebsite.com’ |
Important: Whenever making changes to environment variables, stop the web application and wait about 20 seconds, then restart. This will ensure the “containers” that Cosmos runs in fully stop before restarting.
4. Enable or Disable Local Logins
By default the environment variable “AllowLocalAccounts” is set to true. This allows users to create accounts and login using the Cosmos built-in authentication system (aka “local accounts.”). If you added Microsoft authentication as shown here, this setting will allow both local accounts and Microsoft accounts for sign up and sign in.
Disable local login
In some cases, users may be required to use their Microsoft account only--and not sign up or sign in with a local account. If this is the case set the following environment variable as follows:
AllowLocalAccounts = false
5. Publisher-specific Settings
Your website is normally setup to allow anonymous access--in other words--it does not require users to log in.
To disable anonymous access for the Publisher, and require login, set the following environment variable with both the publisher and editor to “true”:
CosmosRequiresAuthentication = true
Limit access by Entra ID Security Groups
Normally anyone able to authenticate using Microsoft as shown above with your Publisher, will have access to your website. You can further restrict access by limiting access to those Microsoft accounts that are a member of one or more Entra ID Security Groups.
Add the following environment variable to the publisher's configuration as shown below:
EntraIdValidUserGroups = Group1;Group2;Group3
Note that if you have more than one group, each group name is separated by a semicolon.
Example User Experience
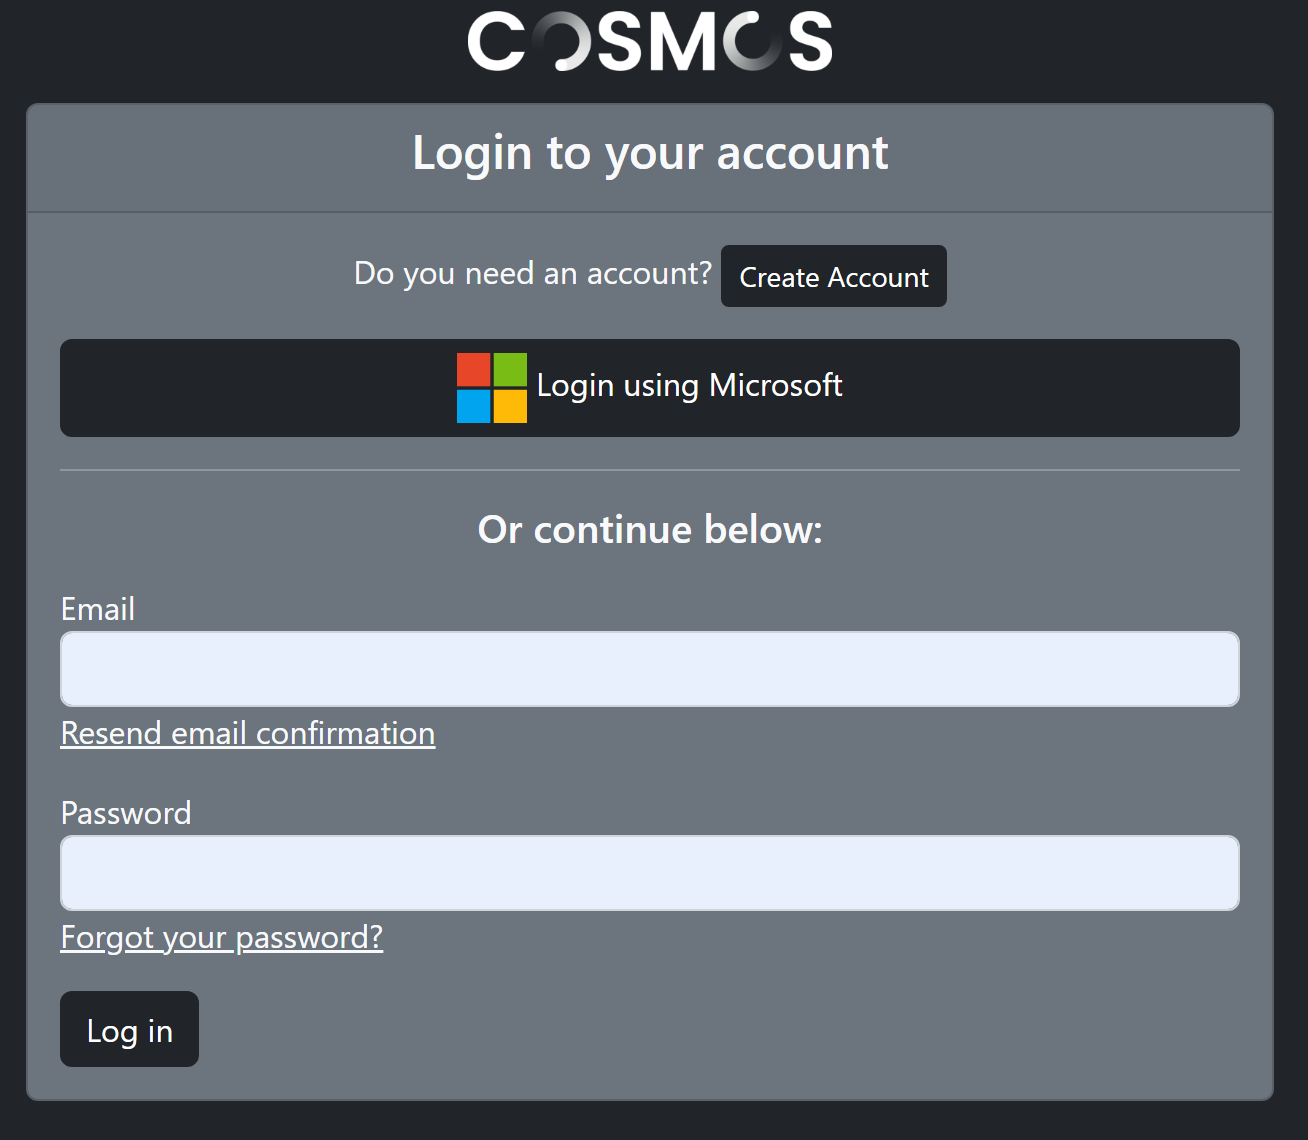
Below is a screen shot of what the user will see when creating an account with “local” account and Microsoft enabled.

And this is what the login screen looks like.