Content Delivery Networks, or “CDNs,” significantly speeds up websites through caching content on servers that are geographically close to where users are located. For example, a user in Miami, Florida might request a web page from a website hosted 2,734 miles away in Seattle, Washington. The website has a CDN with a caching server in Miami. The user will receive the web page not Seattle, but from Miami. This has two important effects: (1) web pages are delivered much faster, and (2) overall capacity goes way up to serve up web page requests.
Cosmos is built to work with CDN's to ensure that users get the most up-to-date version of your content immediately by triggering CDNs to refresh content when a web page has changed. It also embeds
Please note: When using Edgio with the DSA option, Cosmos integration is not necessary as content refresh is automatic and immediate.
Cosmos has built in support for the following CDNs:
The first step is to choose which CDN to use. For a detailed breakdown of how Edgio, and Microsoft CDN compare, see Microsoft's documentation. Meanwhile, here are a few key differences that might help you decide:
Click “deploy” then on the next screen choose “Explore other offerings.”
On the next dialog, choose the CDN you would like to install. Microsoft has documentation that compares the capabilities of each.
On the next screen, fill choose the resource group where you want to deploy the CDN and give your installation a unique name.
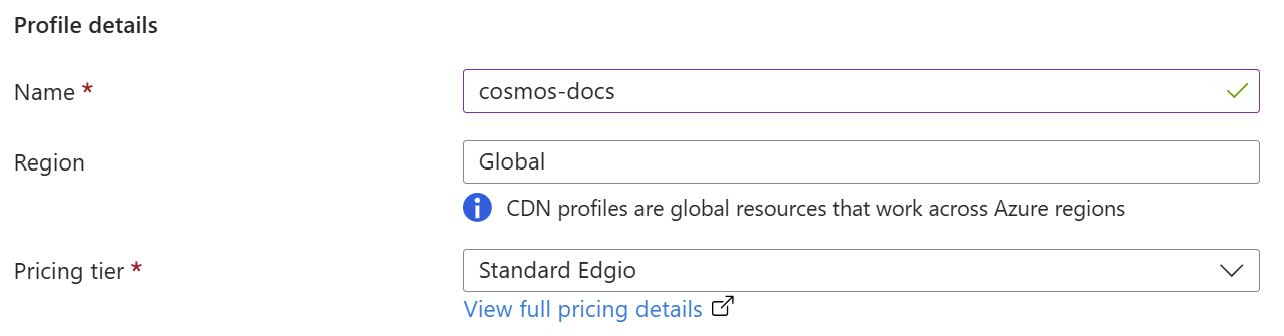
Now give your CDN profile a unique name and check to ensure your “pricing tier” or CDN option is correct.
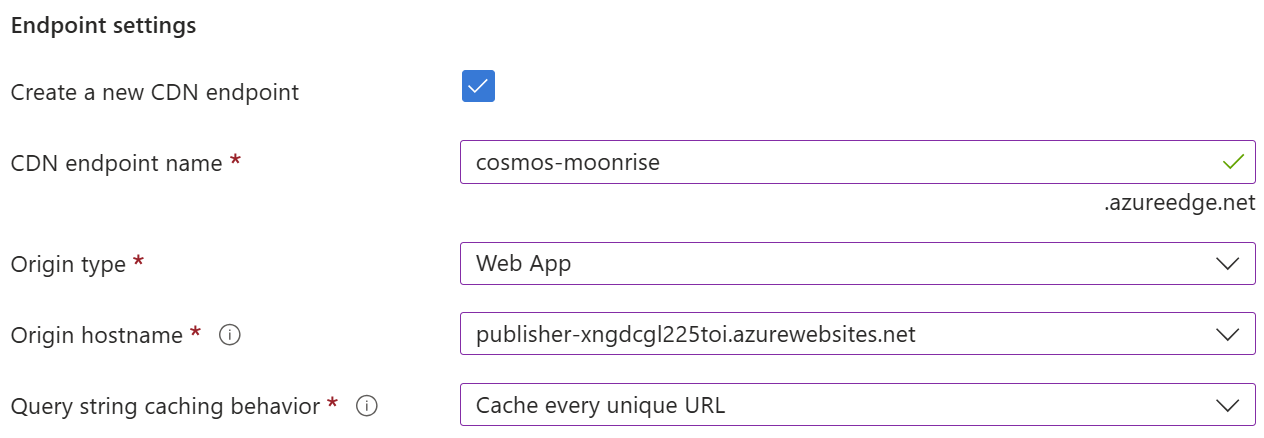
At the bottom of the dialog check “Create a new CDN endpoint.” Then for origin type choose Web App, and select your publisher website, then set the query string caching behavior to “Cache every unique URL.”
Now you are ready to deploy the CDN. Choose “Review and Create” to continue. When installation is done, click “Go to resource.”
Now we need to give Cosmos permissions to interact with the CDN.
From the profile page of the CDN you just installed, click “Access Control (IAM).” From here click on the “Add” drop down button and choose “Add role assignment.”
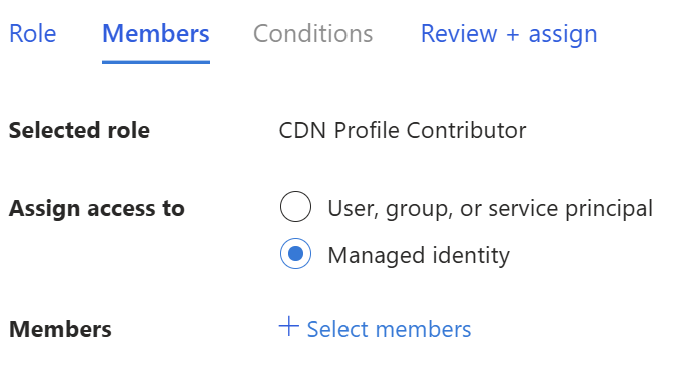
From the list of Role Assignments, select “CDN Endpoint Contributor.”
On the next screen select “Managed identity” as shown below, then click “Select members.”
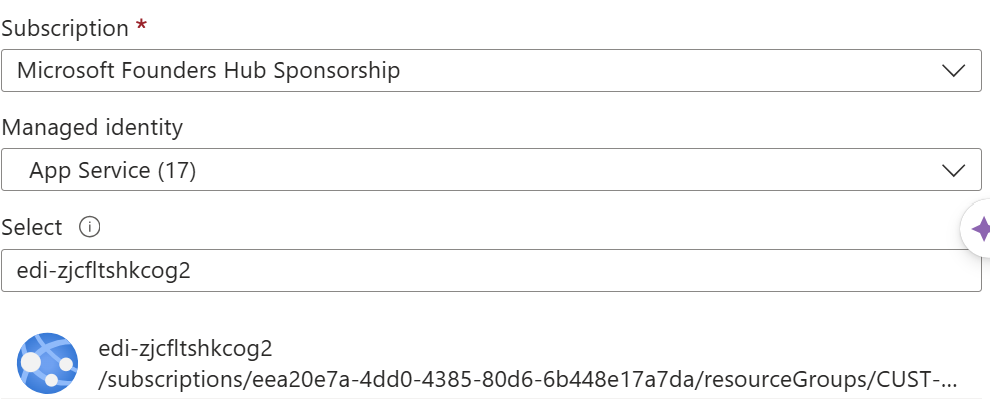
Then you will add the Cosmos “Editor” application by choosing “App Service” under managed identity, and then select the name of your editor like below. When done click “Select.”
Complete this task by clicking “Review and Assign.”
Once you have installed a CDN you will need to configure Cosmos. Open your Cosmos Editor application and click on “Menu” and choose “CDN Setup.”
Azure CDN
If you are using an Azure product, click on “Edgio or Microsoft CDN” to expand the input form. Here input the Subscription ID, the name of the Resource Group where the CDN is installed, the CDN profile name and Endpoint name.
Next click “Test and Save Settings.” If there is a problem with the connection, the error will be displayed.
Sucuri Firewall/CDN
To configure Sucuri click on "Sucuri Firewall/CDN.
Here you will need two pieces of information from the API page of your dashboard: The “API Key” and “API Secret.”
Next click “Test and Save Settings.” If there is a problem with the connection, the error will be displayed.