Installation
It takes about 5 minutes to install Cosmos into your Microsoft Azure account. If you do not already have one, get a free one by clicking the button below.
Step by Step Instructions
Begin by clicking the button below.
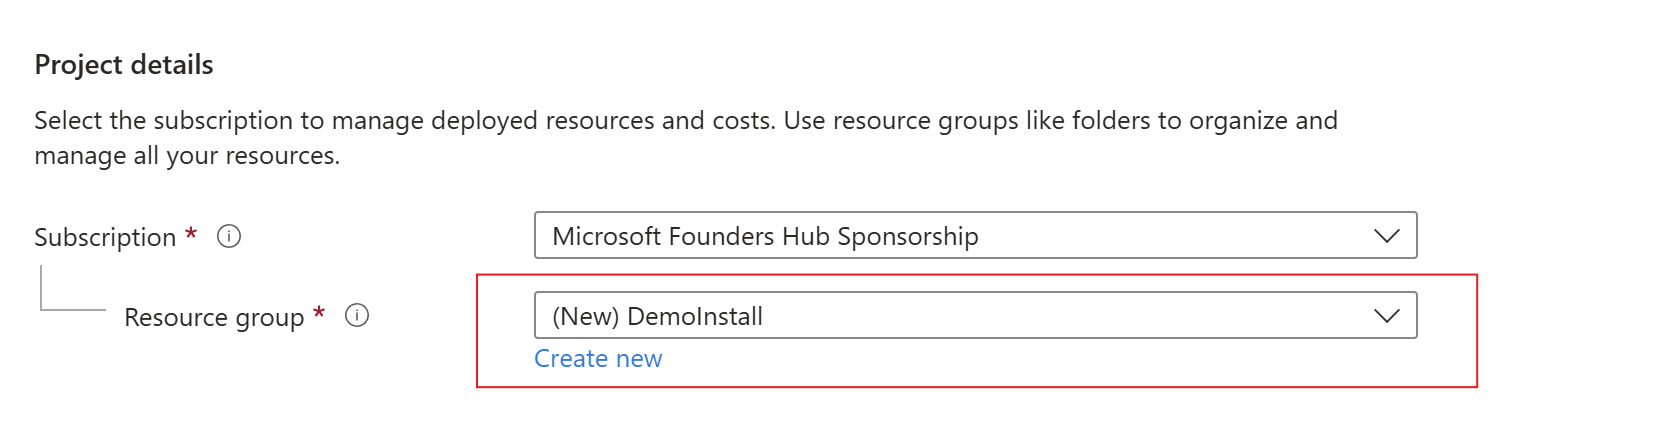
1. Select or Create a Resource Group
This will open the “Custom deployment” dialog in Azure. At the top find the resource group dialog. Either create a new Resource Group or select an existing one.
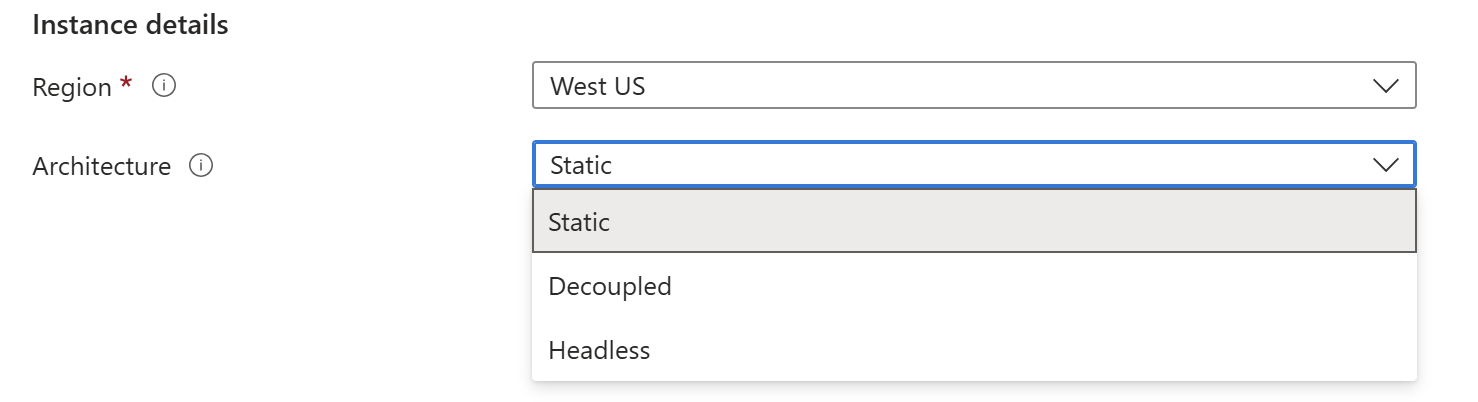
2. Choose a Region and Architecture
Select a region where you want Cosmos to be installed. Best practice is choosing a region that is physically closest to your users. If cost is a concern, use the Azure Pricing Calculator to find a region with lower costs.
Next, choose the type of system you want. Your choices are “Static”, “Decoupled”, and “Headless.” Refer to the documentation below for more information.
3. Add an Email Address
Cosmos uses Email to send messages to website users such as, password reset requests, verify email requests, and special system alerts. Enter an email address that will be used as the “From” email address in these messages.

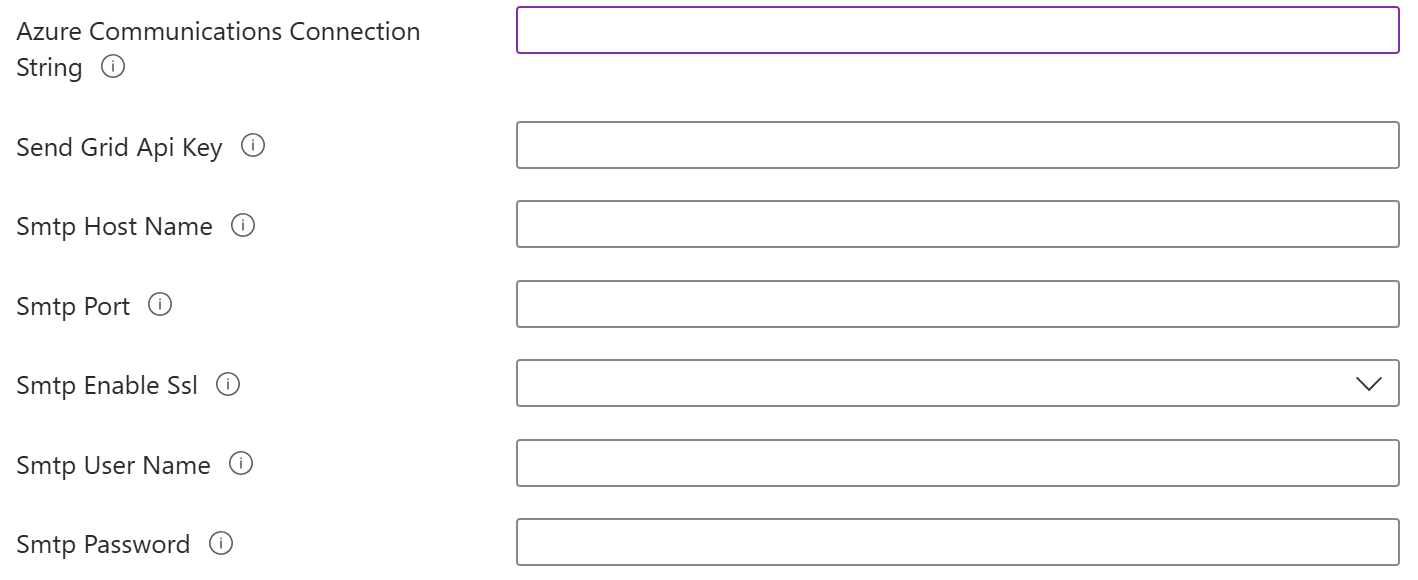
4. Setup and Email Service
Cosmos will integrate with one of three Email services: Azure Communications Email, Twilio SendGrid, or any SMTP Server. This step can be skipped if you want to setup an Email service later.
5. Choose and App Plan and Storage Account Type
The last two things to select are the web app plan choice and storage account type. There are two options for web app plan: Premium and Basic. Installation is much faster with premium as this plan has more resources. To save money or increase capacity you can choose another plan type and increase the number of instances (see Microsoft documentation for more information). See the documentation below to help choose a plan type for Cosmos.

With regards to storage account, there are two options. Locally-redundant storage has three copies of each file in the region you selected. Geo-redundant storage automatically replicates files into another region. Use the latter option to have a static website in two regions. Do this for added resiliency and output capacity.
6. Review and Create Cosmos

Click the review and create button to bring up the next dialog.
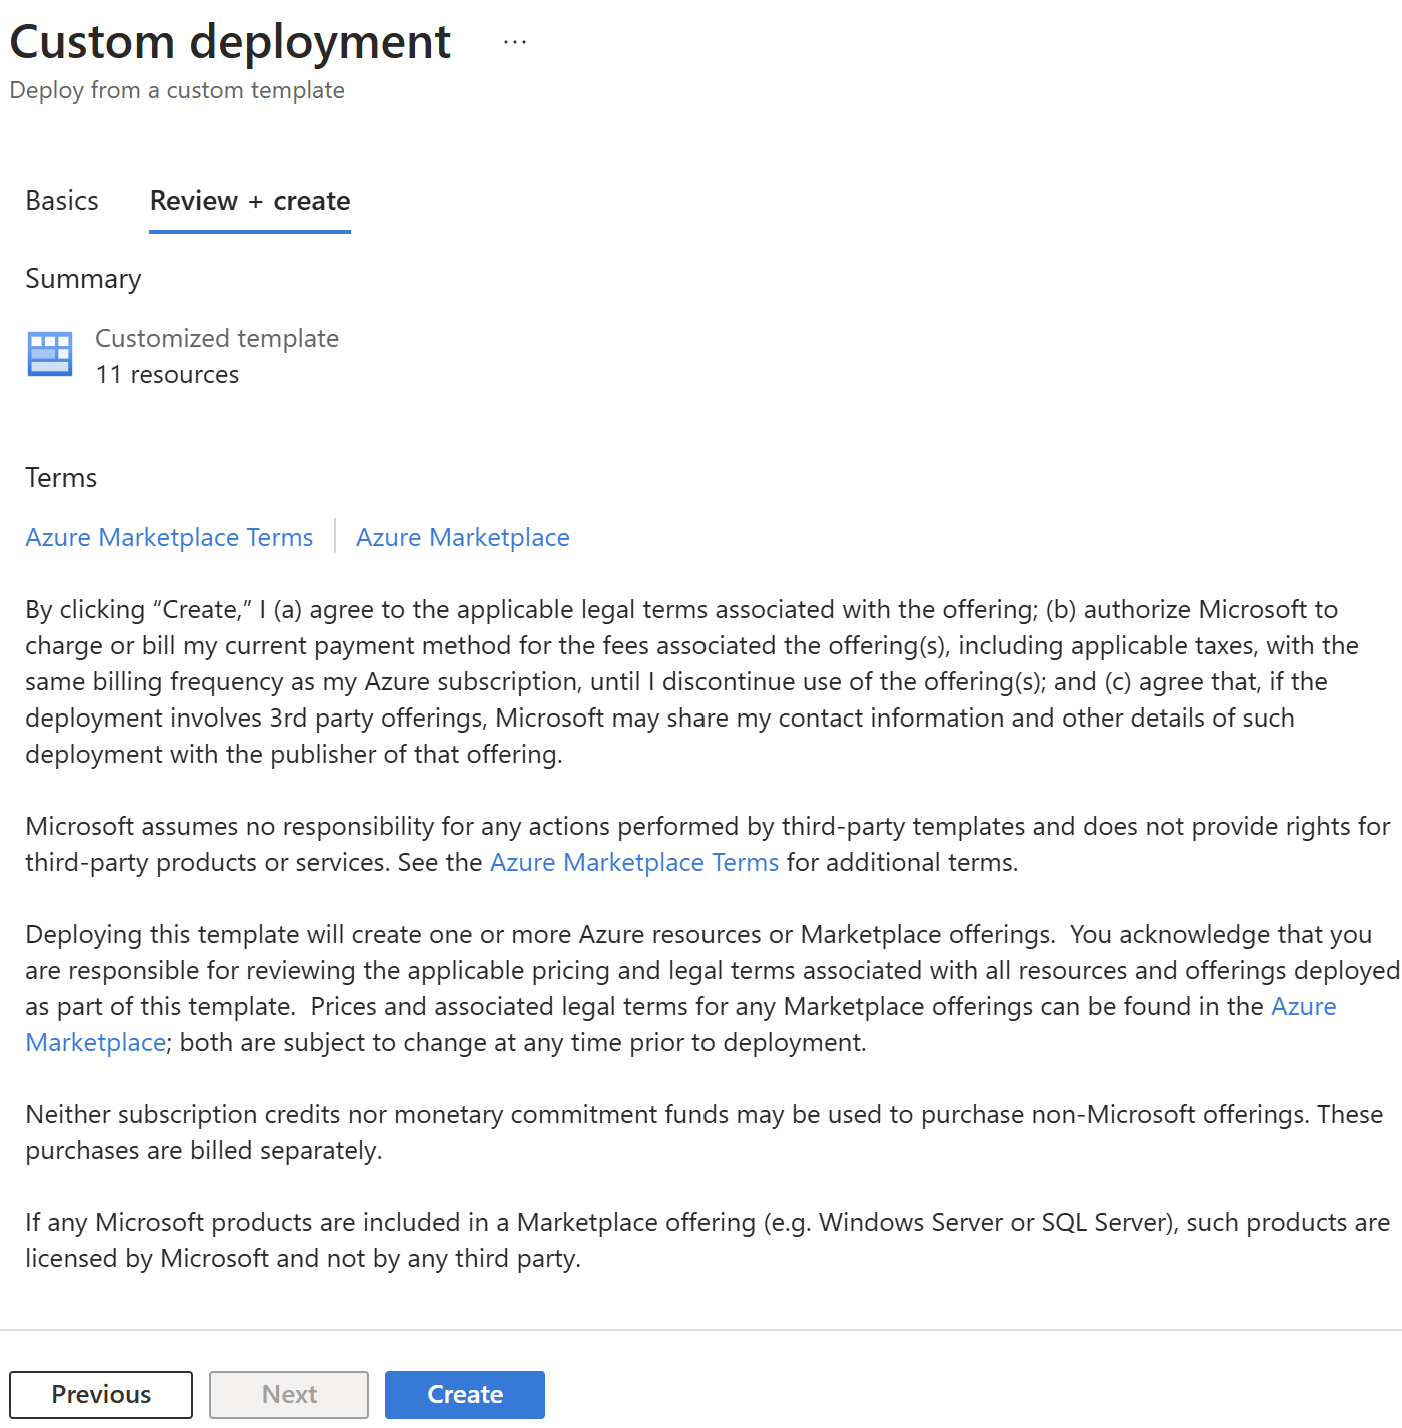
Click the “Create” button when ready. In about 3 to 5 minutes the installation will be complete.
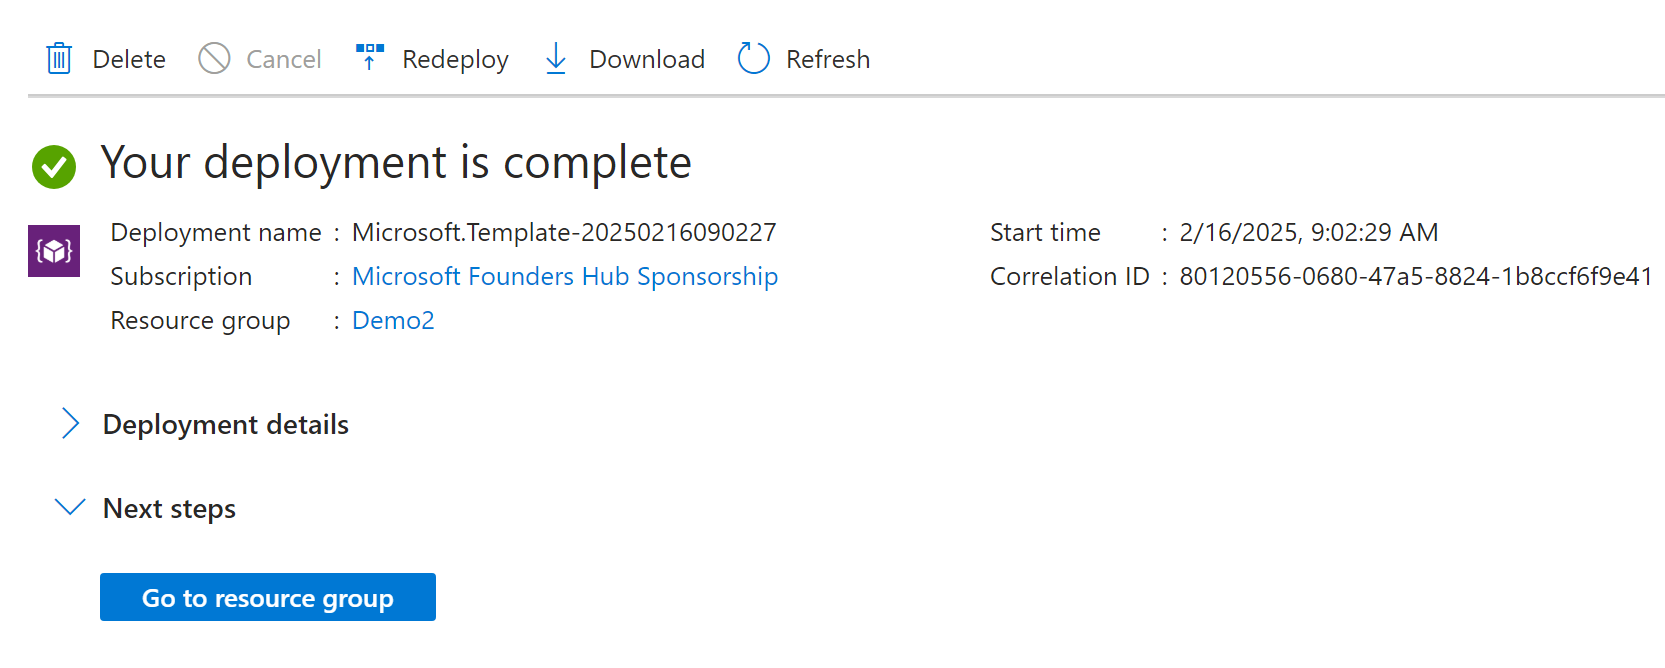
Click the “Go to resource group” button.
Setup Website
Now we are going to setup Cosmos by creating an administrator account, choosing a site design, and creating a home page.
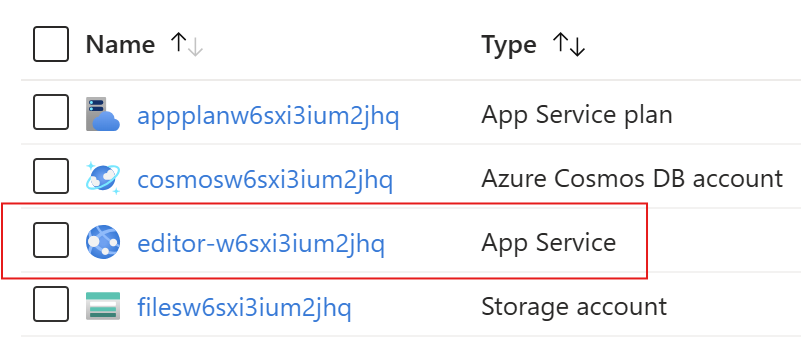
1. Open the Editor App
Within the resource group you will see several items deployed. Find the “App Service” with a name that starts with the word “editor”.
This will bring up the page with all the settings for this app service. In the upper right of the overview page, find the “Default domain” and click on the link next to it. Note: This domain name can be changed later.

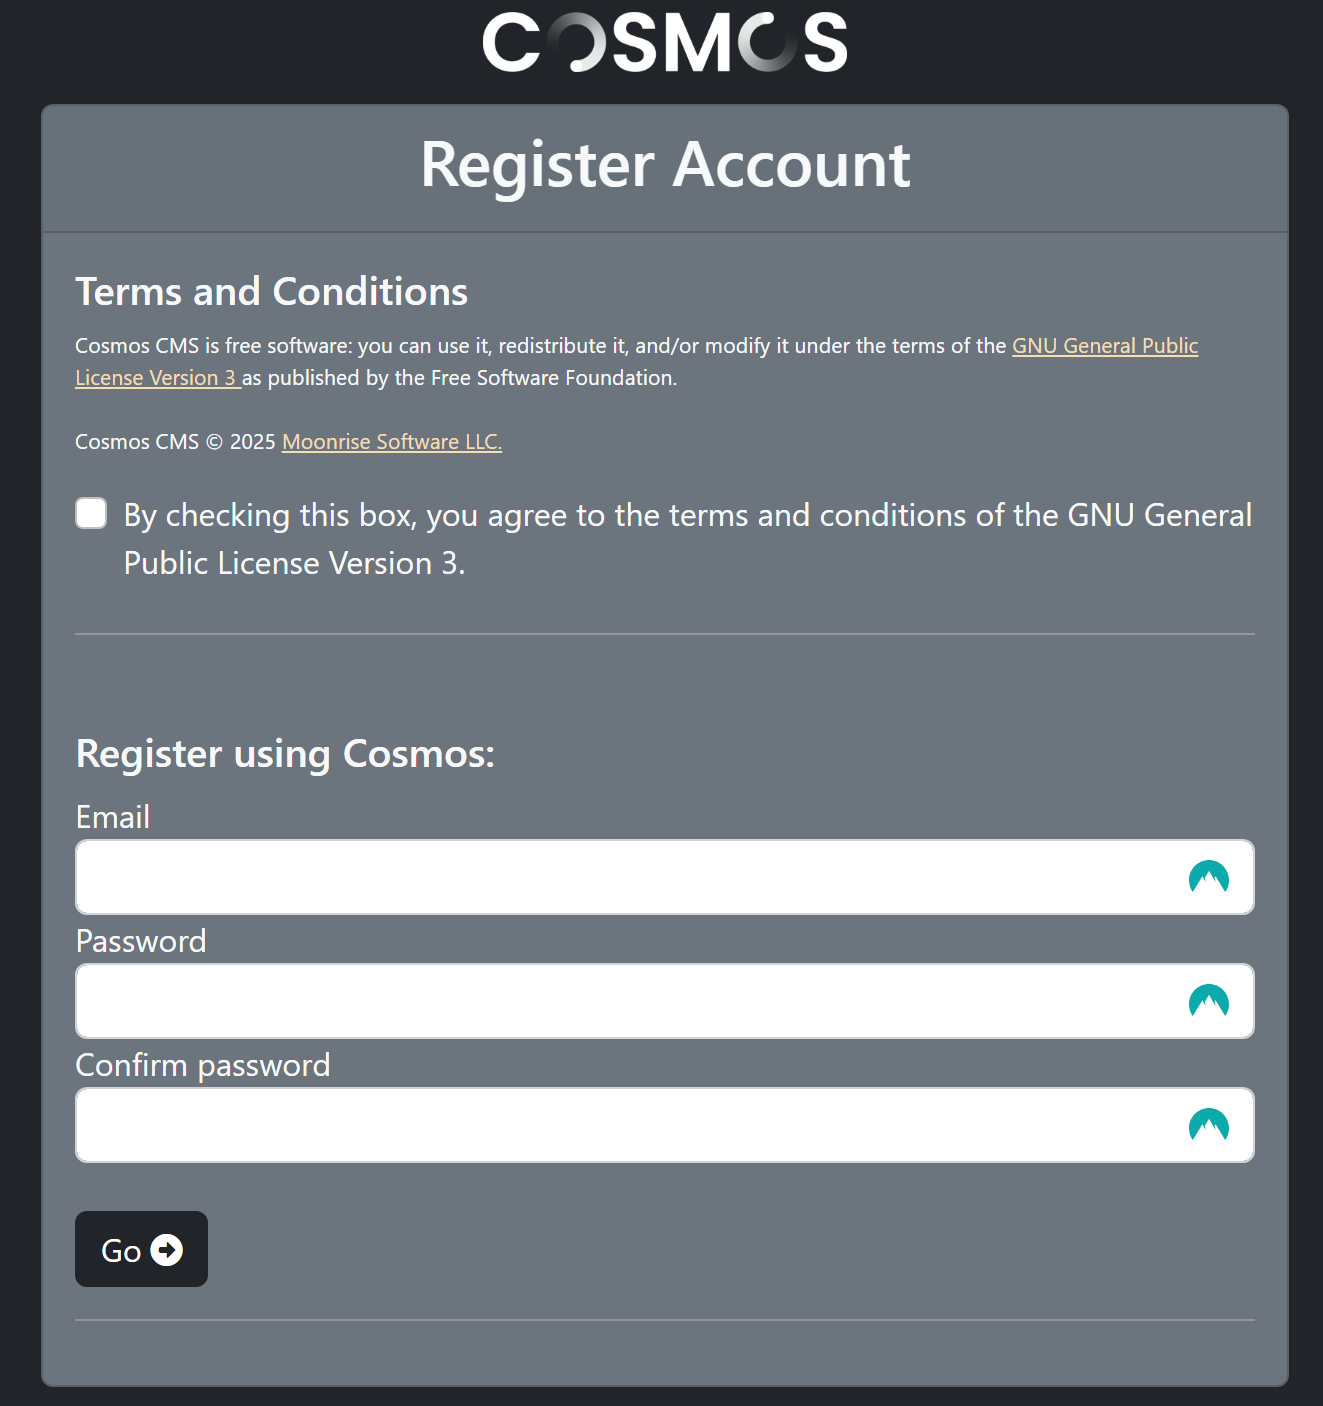
2. Register the Administrator Account
Create your administrator account by entering an email address and a new password. Also, acknowledge acceptance of the GPL open source license.
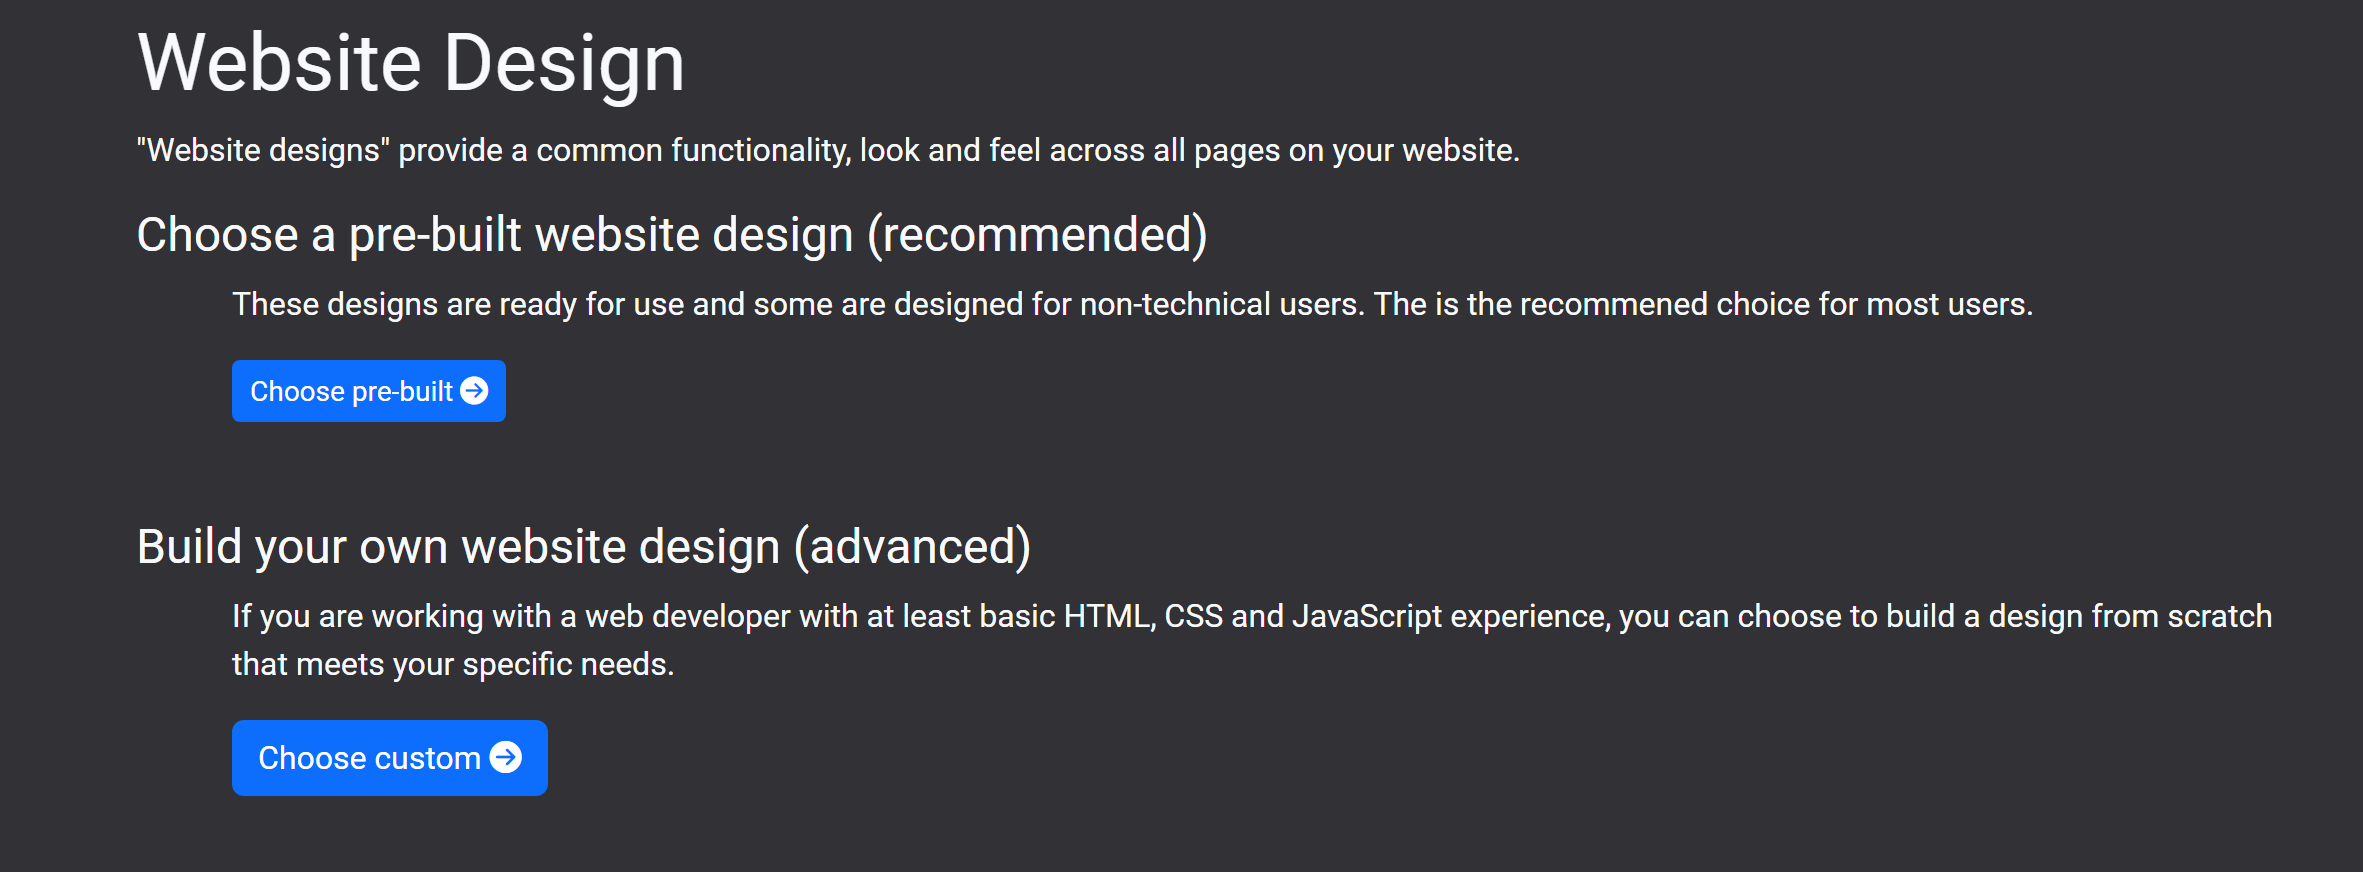
3. Select a Site Design
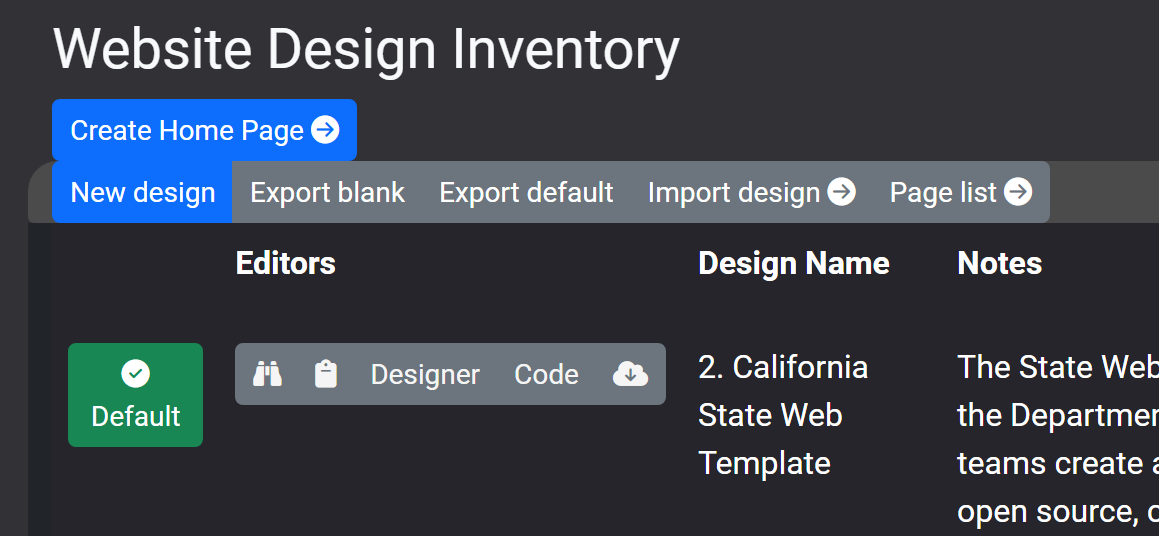
You will need to pick a website design. Choose a pre-built one, or you can create your own by clicking the second button. In this example we are choosing a “pre-built” design.
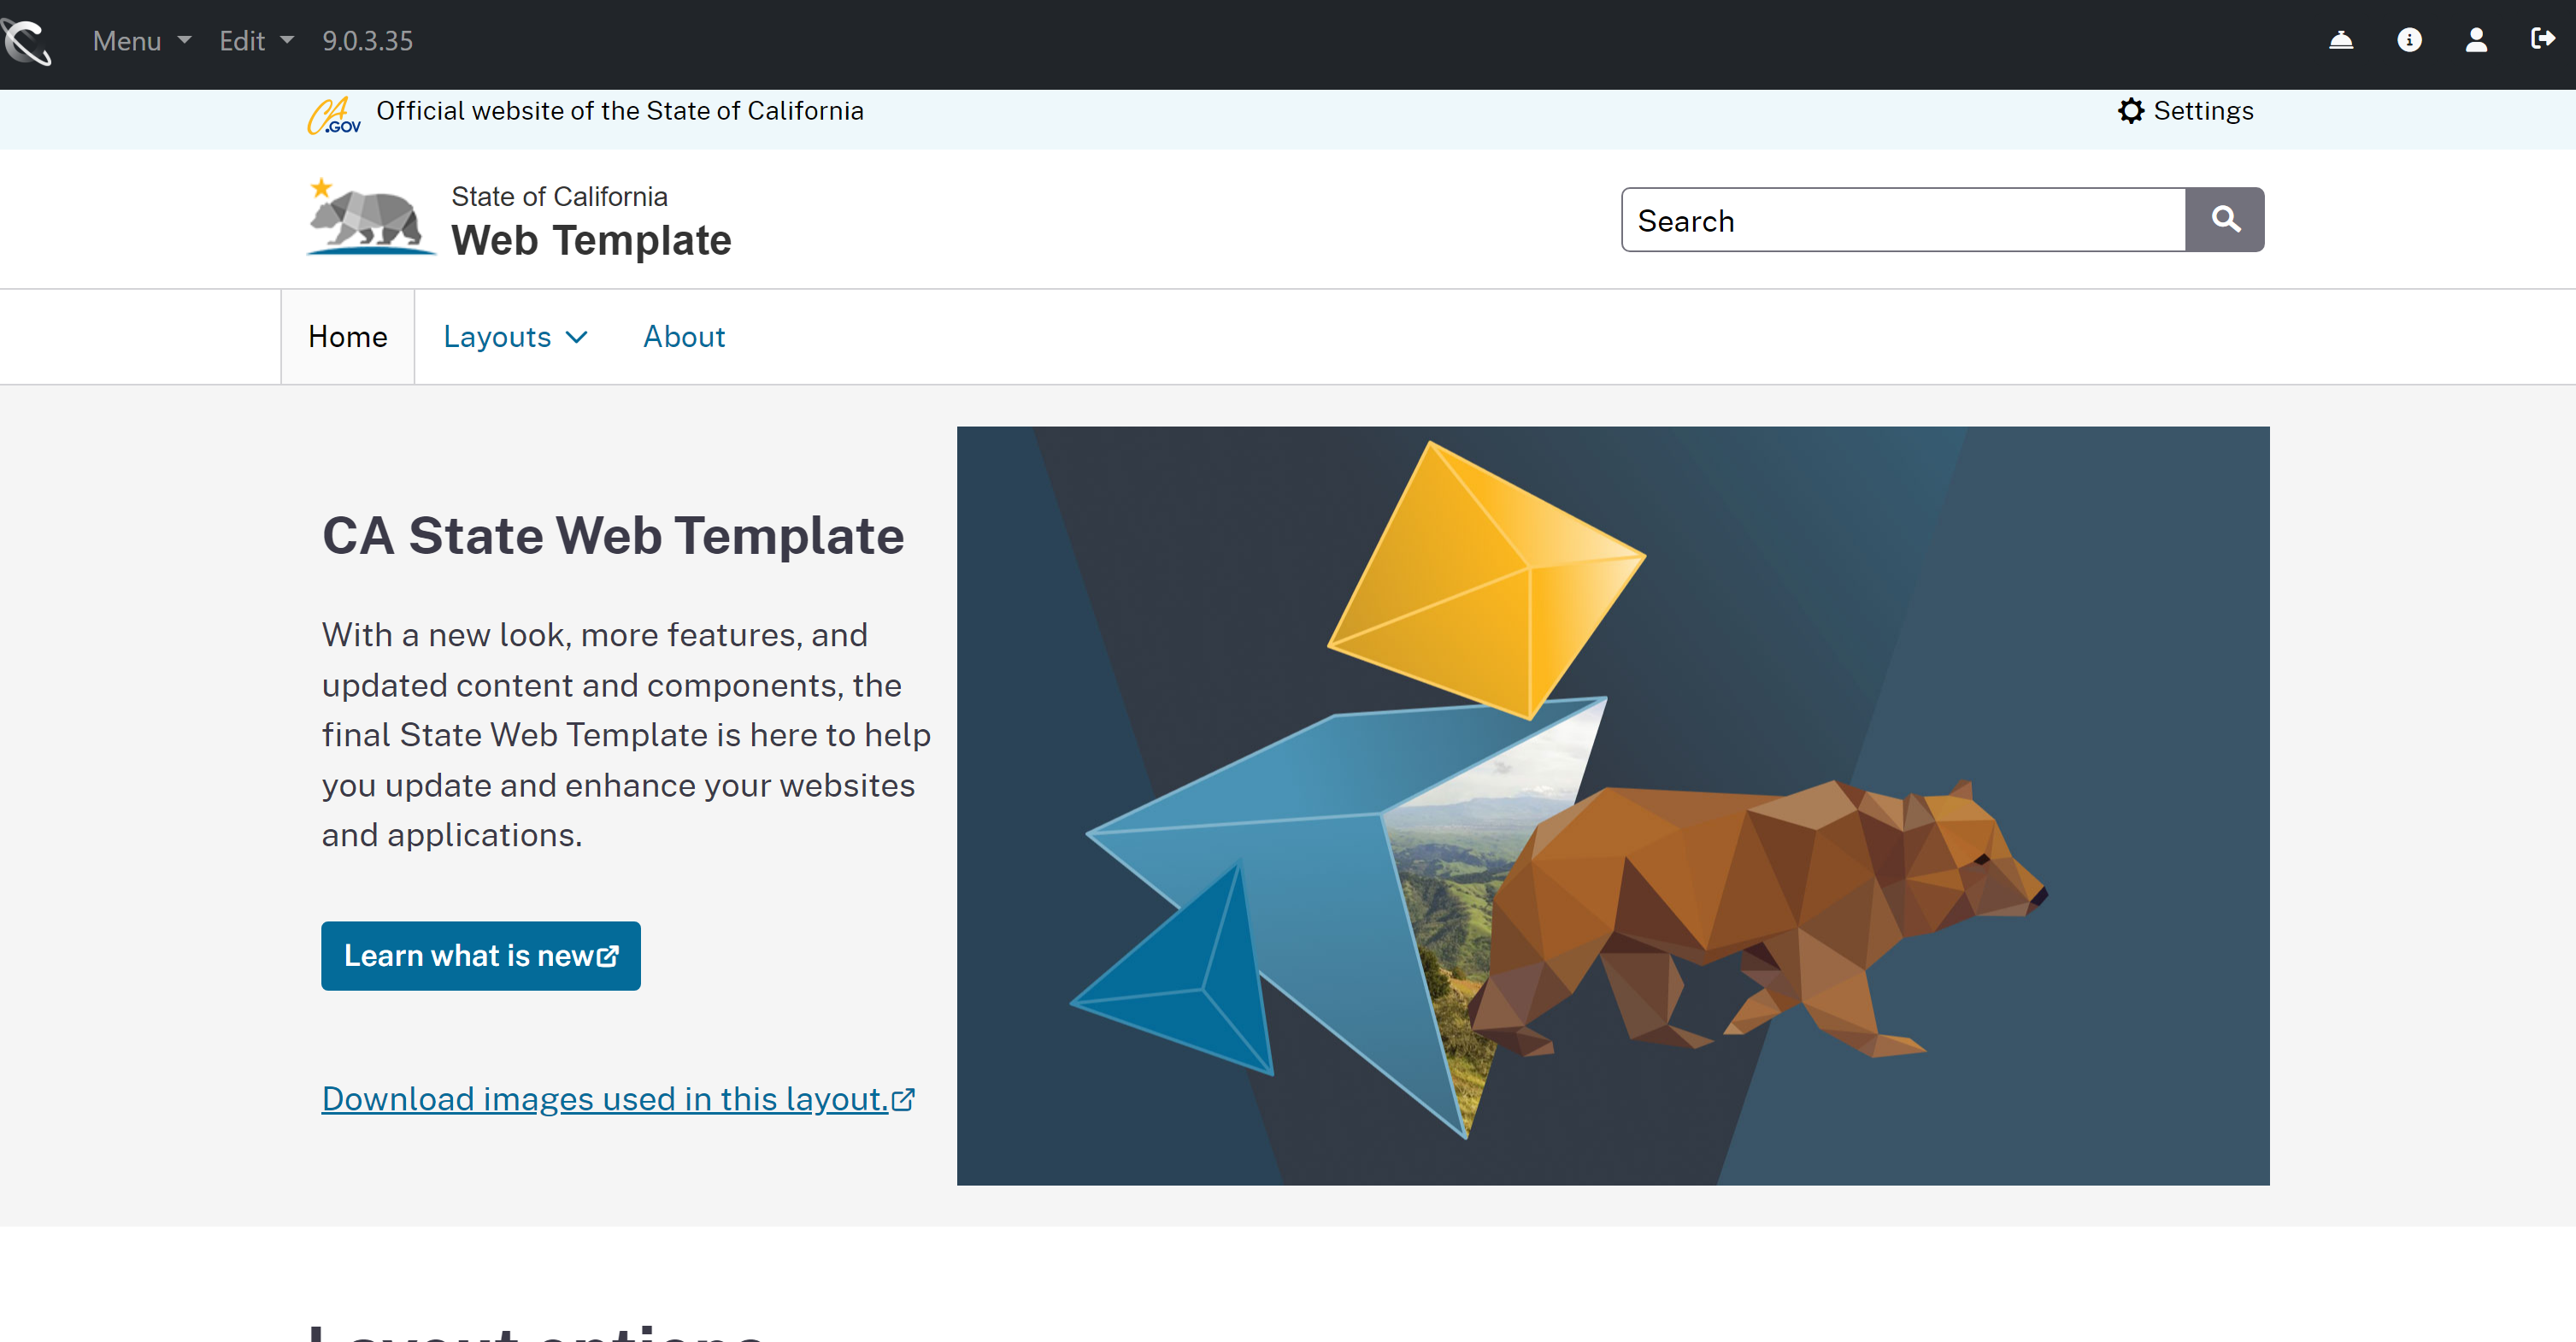
The next page lists several ready to use designs. For this example we “install” the California State Web Template.

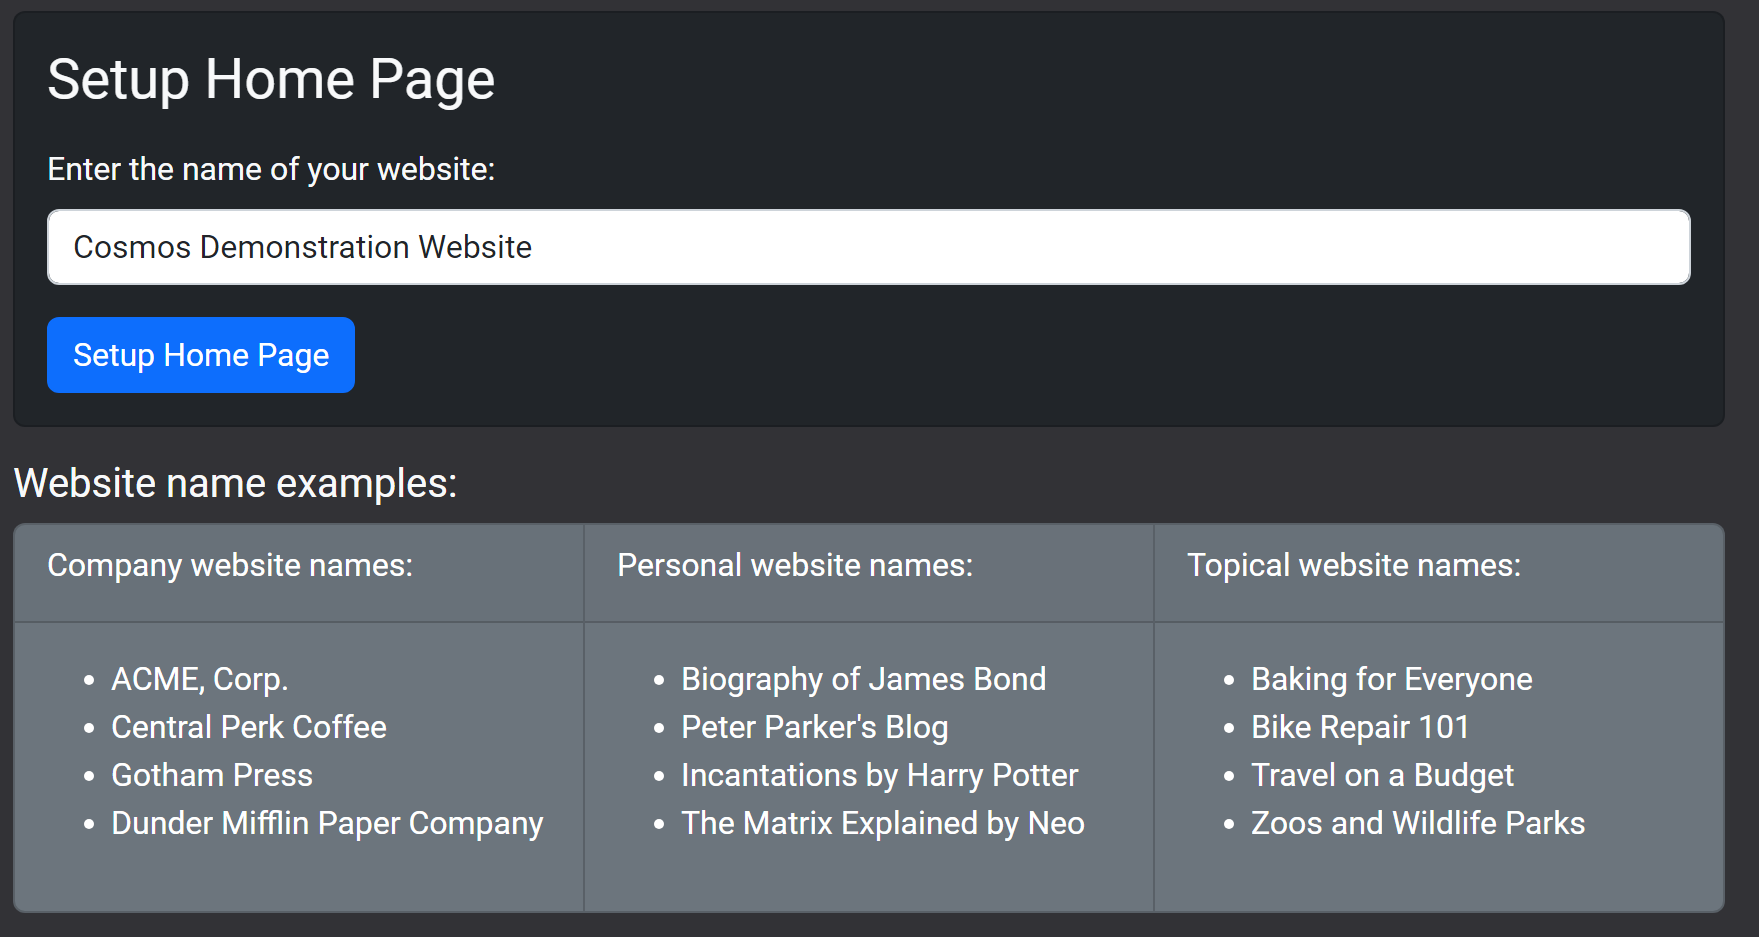
4. Create your home page
On the next page, click the “Create home page” button.
Next, choose a name for your website. Examples are shown on the dialog. When ready, click “Setup Home Page.”
Now your new home page should appear.
Choice of Architecture
Cosmos has three architecture configuration for you to choose. Below is an explanation of each.
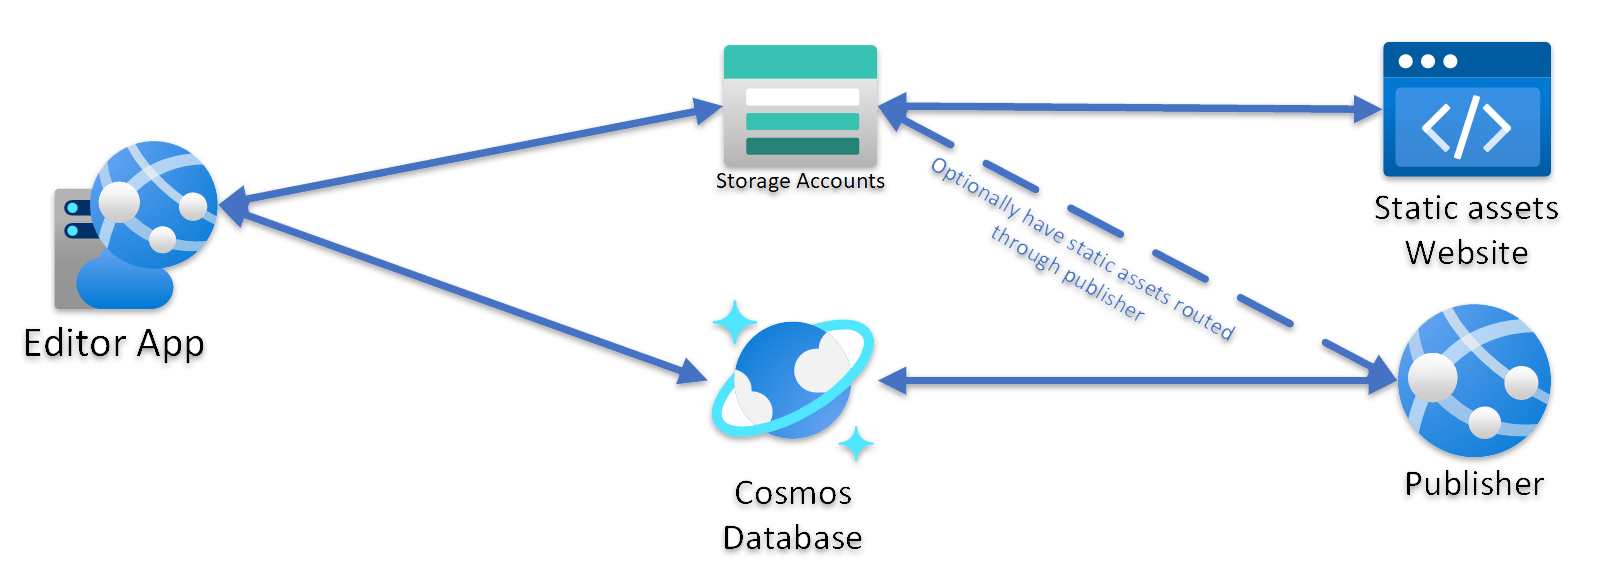
Static Website
Static is the simplest, most strait forward, and is the lowest cost and best performing of the options. It consists of four components as shown below: a database, the content editor app, and the static website. The editor app automatically publishes pre-rendered web pages to storage that hosts files for the static website.

Decoupled
Decoupled architecture adds a dynamic website to the mix. If the static website is used in conjunction to host assets like images, CSS, JavaScript and other files, this option offers similar performance as static, but the ability to allow website users to submit forms and have other dynamic functionality not available on a static website. If the state website is not used, then the dynamic website can secure content by authenticating users.
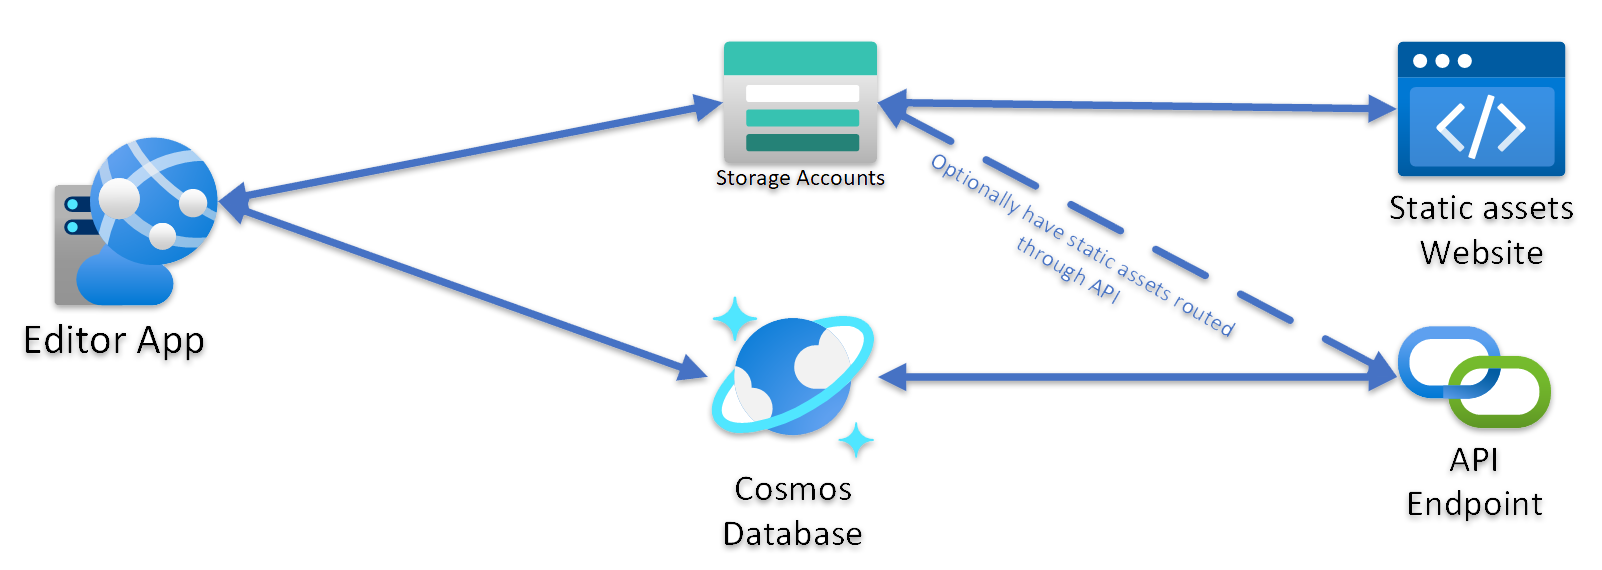
Headless
The basic installation comprises an App Service Plan with two Web Apps, a “serverless” Azure Cosmos DB Account, and an Azure Storage Account. This configuration integrates with two external services. The website and the editor Web Apps are Docker containers deployed from Docker Hub, while email services are primarily utilized for user account management and notifications.
App Service Plan
Two App Service Plan options are available during installation--after which you can change the plan to one with higher capacity if needed, or a plan with less capacity that can save money.
The two options during installation are:
Basic and Premium, the latter is considered by Microsoft to be for production workloads. Which tier should you choose? The answer is largely based on the architecture chosen.
Decoupled and API Architectures
With these architectures the choice of App Service Plan size is very important. Reason being that the editor app, the publisher website, and the API service are hosted on the same App Service Plan--and the choice of plan directly effects the performance of each.
You might opt to have the Editor app on its own Plan, and the publisher app or API service on another plan. In addition, it is recommended that for the Publisher and API apps, configure a plan to scale “out” as needed.
For more information, please see Microsoft's documentation.
Static Architecture
With this architecture, the App Service Plan is only used for the Editor App. The static website is hosted by a storage account--which by design is highly efficient and able to handle high traffic loads.
In this case choose the App Service Plan that offers the performance you need with the Editor.
Email Service Provider
Cosmos utilizes external email services to manage routine user account maintenance tasks such as email account validation, password recovery, and system alerts for administrators. Cosmos offers three alternatives for this purpose, and one must be configured before deploying Cosmos.
Azure Communication Services
Azure Communication Services (ACS) is a set of cloud-based communication APIs provided by Microsoft Azure. These APIs allow developers to integrate various communication features into their applications without needing deep expertise in communication technologies.
Here is a video that shows how to create an Azure Email Communication Service for Cosmos.
In the above video you will have saved two pieces of information: the “from” email address of your Email service, and the connection string.
With the connection string and “from” email address in hand, click the button below to install Cosmos with Azure Email Communication Services.
Twilio SendGrid Email Service
Cosmos also works with Twilio SendGrid. You can sign up for a free account with no credit card required.
Once you have setup your account, generate an API Key. It is best to have a key with the ability to send email but do nothing else. This API key will be used during the Cosmos install.
When setting up your SendGrid account, copy down the “from” email address that is setup for your account. This will be needed for the installation.
Now that you have an API key and “from” email address, click the button below to install Cosmos with SendGrid.
Post Installation Steps:
By default, SendGrid restricts API access by IP address. This means you may not be able to use the SendGrid service until you add the “outbound” IP addresses from your website to SendGrid. Here is how to do this:
- Using the Azure Portal, find the “editor” web app for your website. Usually the name starts with the letters “edi”.
- Copy the “Outbound IP addresses” shown on the overview page.
- Add these IP addresses to your SendGrid account.
SMTP Email Service
Any SMTP email service that necessitates a username and password, and permits connections via TLS (SSL), can be integrated with Cosmos. Capture the following information from your SMTP service for Cosmos:
- Host name
- SMTP port number
- Username
- Password
- A “from” Email address.