 Power BI Integration
Cosmos can embed Power BI reports directly into your web pages (see example). If you would like to enable this integration, skip to our instructions below.
Benefits include:
- Save money and administration headache because your viewers do not need individual Power BI licenses.
- Greatly improve the user experience by providing videos other media along with your reports.
- Use Cosmos's built-in authentication system to restrict access so to certain reports.
Once you enable this integration, it is easy to embed a report on a Cosmos web page. It only takes three steps and does not require special skills.
1. Place a “div" tag on your web page where you want the report to be placed like this:
<div id="report-container" class="embed-container" style="height:65vh;">
</div>
Note: Give the div an “id” and add the “embed-container” class, and an optional “height” to the style attribute.
2. Add the Power BI JavaScript libraries at the bottom of your page:
<script src="/lib/powerbi-client/powerbi.js"></script>
<script src="/lib/cosmos/powerbi.js"></script>
3. Below that, add the following JavaScript snippet:
document.addEventListener("DOMContentLoaded", function(event) {
	const workspaceId = "2012c9d4-180b-4a79-965b-6c078c6fdae1";
	const reportId = "4985ca57-f1c9-48c5-99ae-8308c8f2e534";
	// "report-container" is the div "id" provided above.
	ccms___LaunchPowerBiReport("report-container", workspaceId, reportId);
});
Note: The “workspace ID” is also known as the “group ID."
Enabling Power BI Integration
Enabling Power BI Integration requires these general steps:
- Create an Entra ID Application and save it's Tenant ID, Client ID and Client Secret.
- Create an Entra ID Group and make the application a member.
- Setup Power BI to allow the group to call workspaces and reports.
To get started you need a Power BI license and an Azure account (which is free).
Next, Cosmos uses Entra ID (formerly Azure AD) to authenticate with Power BI, so the first step is to create an “Application” with Entra ID on your account.
1. Creating an Entra ID Application
Open Entra ID on your Microsoft Azure account, then click on “App registrations” button on the left side of the web page.

Now click on the “New registration” button

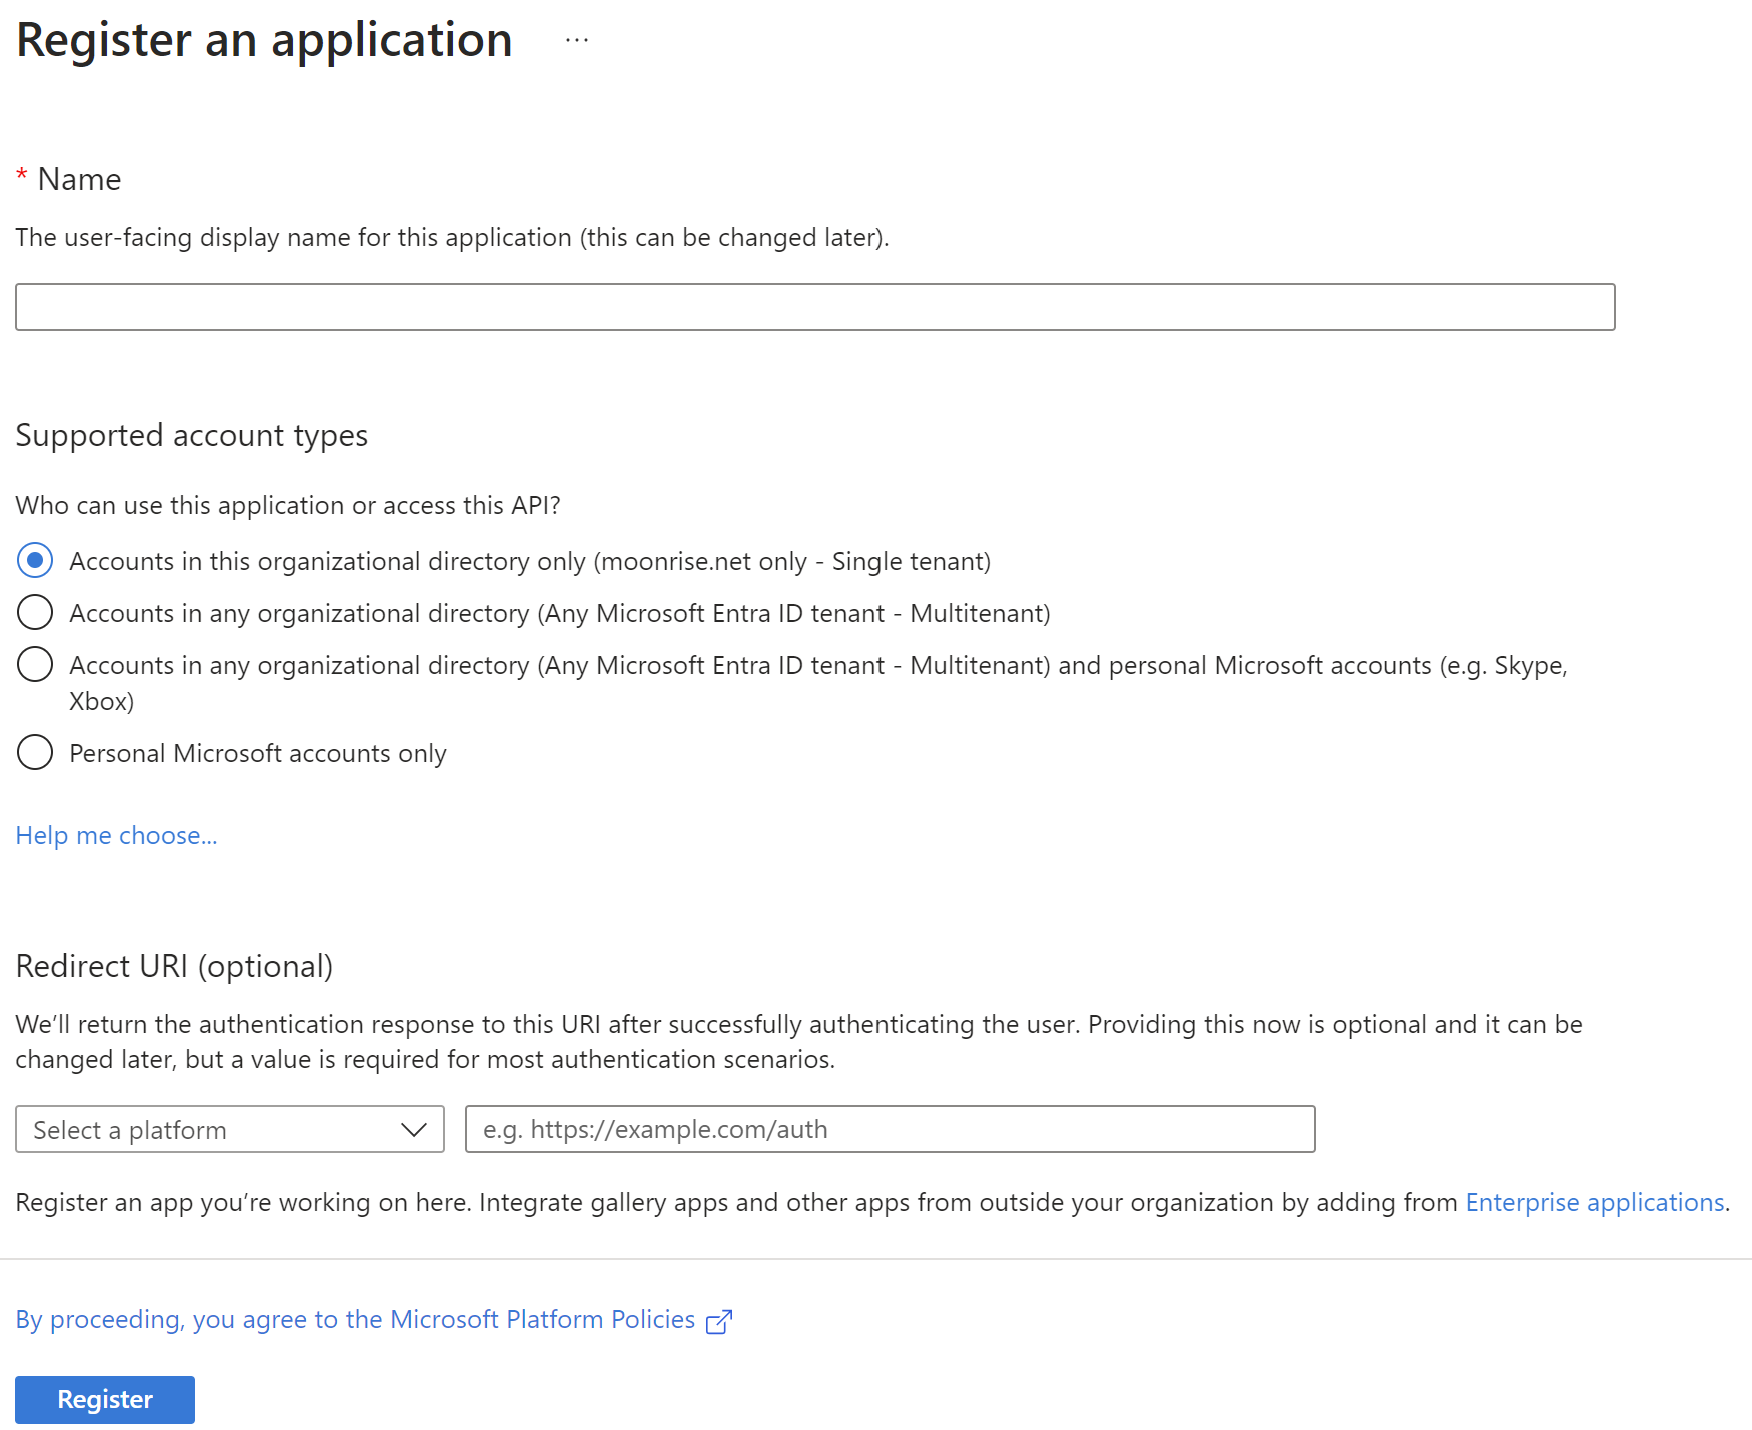
The “Register an application” dialog appears. Next:
- Give this a name. Use the name of your website as an example.
- Select one of the supported account types. “Accounts in this organizational directory" will suffice.
- Then click “Register.”
2. Creating an Application “Secret”
You should find your application listed on the “App registrations” page. Note, you may have to click on “All Applications” to see it.
Then find the “Certificates & secrets” button and click on it.

Then click on “New Secret” to open this dialog.
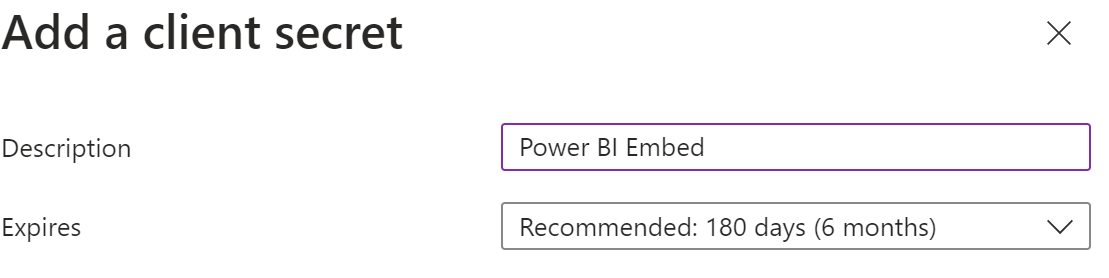
Add a description for what this secret is used for, then click “Add.”
You will now see the secret displayed. Save it temporarily to the note pad as you will need it later.
IMPORTANT! Copy and save this secret now as you will only see it once on this page.
Getting the Client and Tenant IDs
The last thing to do with Entra ID is to get the Client and Tenant IDs. Click on “Overview” for your application and you will see the following:
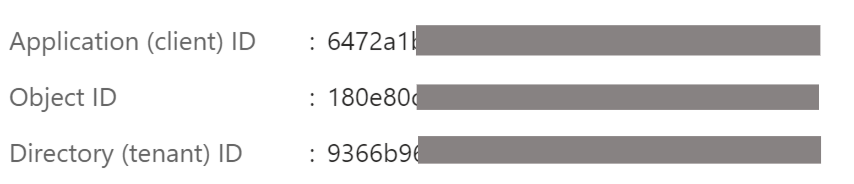
Save the “Application (client) ID” and the “Directory (tenant) ID.”
3. Create an Entra ID Group
Next step is to create an Entra ID Group that will be given access to your Power BI reports, and then add the registered application created above to this group.
Start by opening your Azure Entra ID Group page then clicking the “New group” button.

This will open the following dialog:
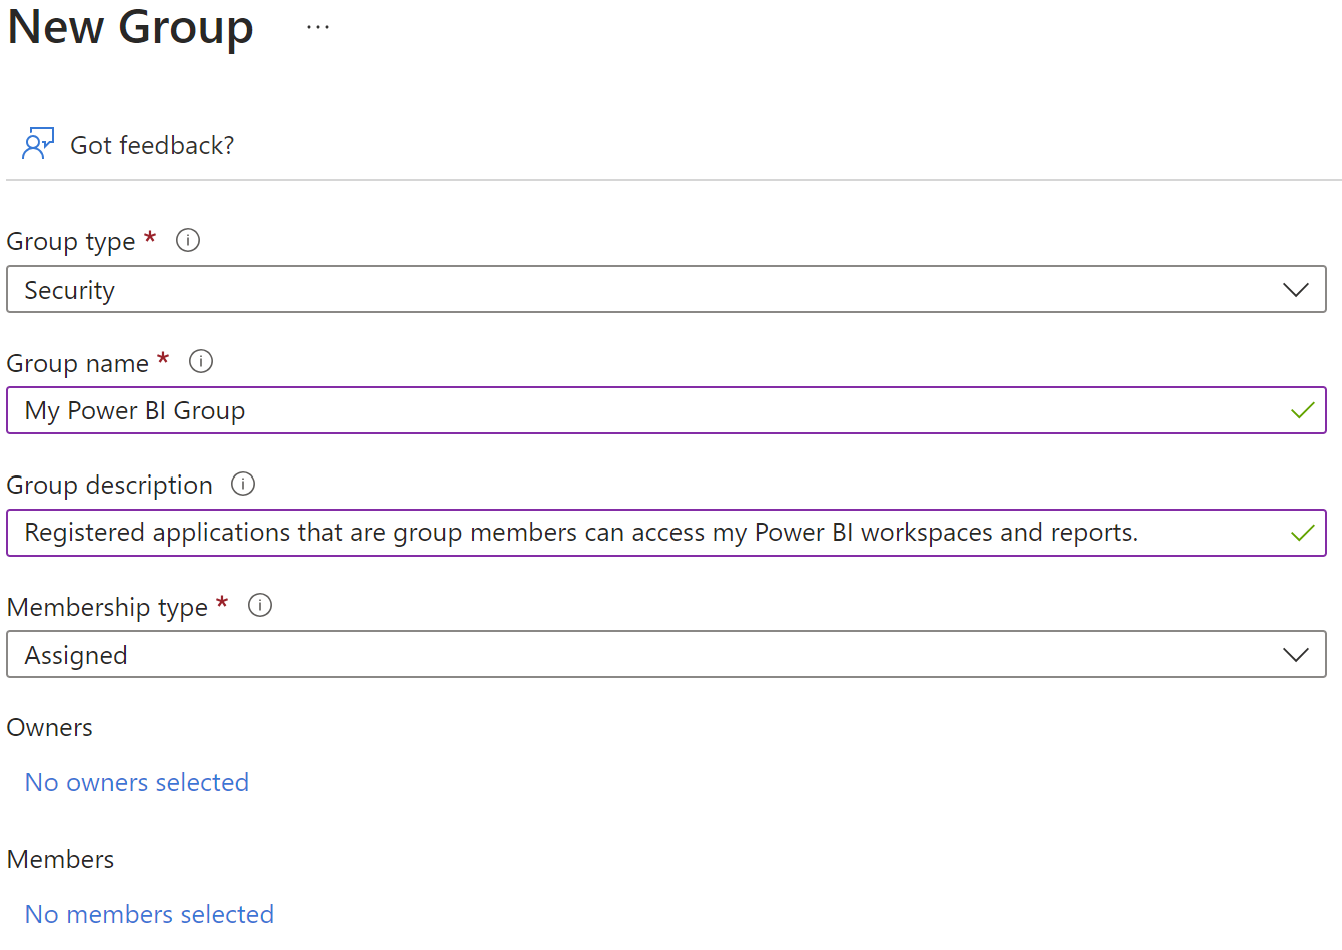
Add your own group name, then click “No members selected" to add the Registered App you created above.
4. Configure the Editor and Publisher Web Apps
Next, you will need to configure the environment variables of your editor and publisher web applications.
5. Setup Power BI.
Now we are going to give the group above permissions to access your Power BI account.
Open your Power BI account and select the settings icon.
![]()
Then open your Admin portal.

Scroll down the main part of the page until you read “Developer settings.”
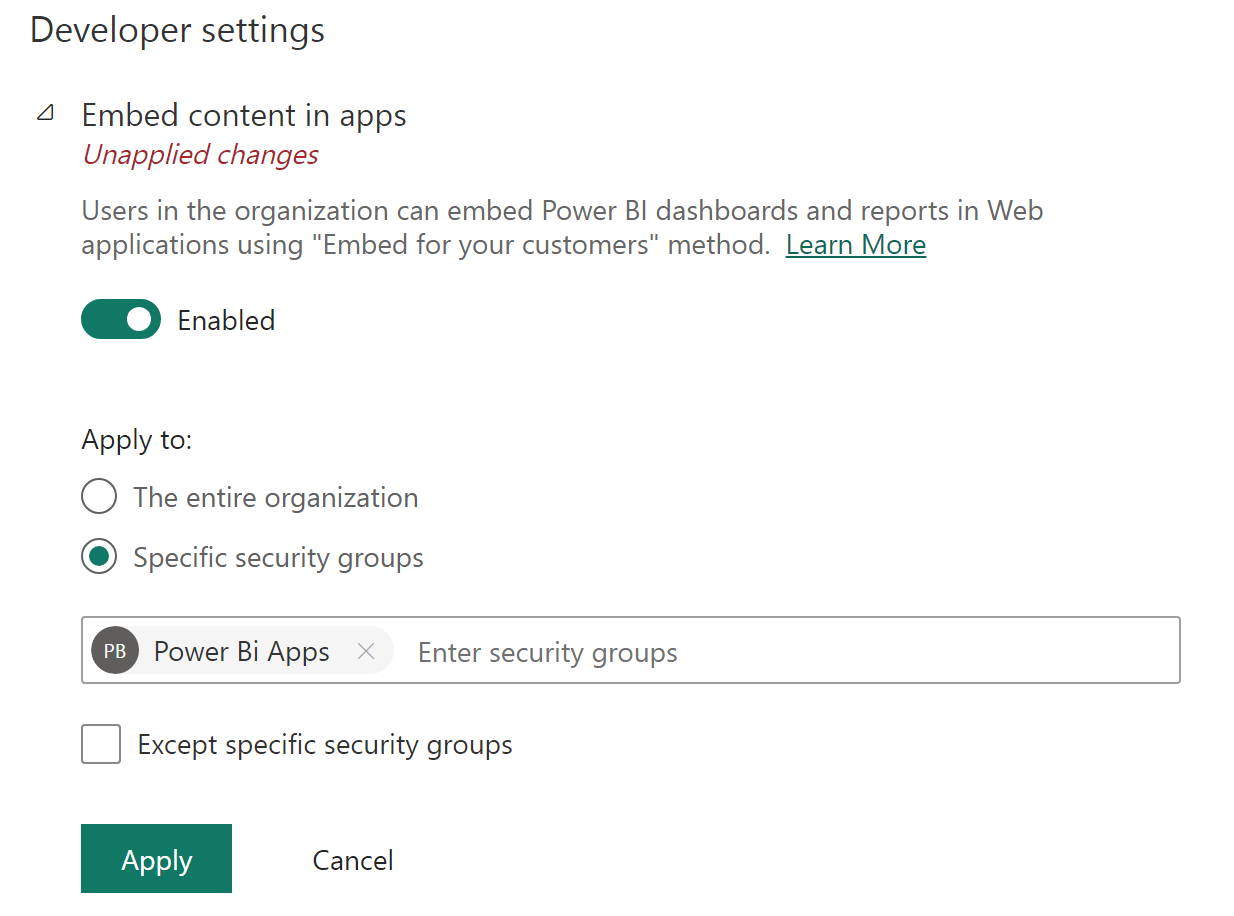
Here make sure that “Embed content in apps” is set to “Enabled” and you choose “Specific security groups.” Then add the security group you created above, the click “Apply.” Wait 15-20 minutes for this to fully save before adding Power BI reports to your website.
Note: What if the group is not found? If you create a new group in Entra ID, it may take a while for Power BI to see it. If this is the case, wait several minutes and try again.
6. Grant Access to your Power BI Workspace
To enable reports from a workspace to be used, open the workspace and click “Manage access.”

On the next dialog, add the Group you created above to this workspace and give it “Member” access. “Viewer and ”contributor" are not supported at this time.