Password-less Connections
This article shows how to “harden” Cosmos security by using “password-less” connections between the Publisher and Editor App Services, to Azure Cosmos DB and Azure Storage.
Prepare Cosmos for Password-less Connections
To begin you will need to gather information that you will need later. Start by opening up the Azure Portal and navigating to the Resource Group where your Cosmos website is installed. You should see something like the following (you may have more items depending how your Cosmos site was installed):

Here is an explanation of each item:
- Azure Cosmos DB account is the database that holds the HTML and some of the code for your website.
- The App Service starting with “edi” is the web app you use to edit your website content.
- Storage Account is where all your static assets or files are stored. This includes images, CSS, JavaScript, or other files uploaded to your website.
- The App Service starting with “pub” is your website, and this is where your website is hosted for people to see.
The following will show you how to connect the two web apps to the database and storage using password-less connections.
Gather Information
Once there, retain three pieces of information for later use:
- Azure Cosmos DB account name
- The editor app service name (this will start with “edi-”)
- The publisher app service name (this will start with “pub-”)
Editor Web App Object ID
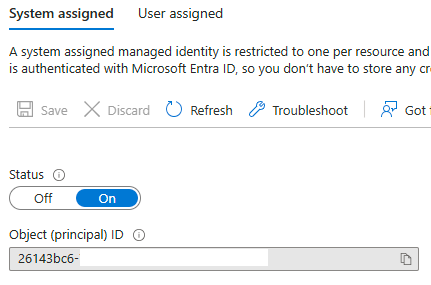
From the Azure Portal view of your Resource Group, click on the “editor” web app. Once the Web App blade appears, find “Settings” and expand it. Now click “Identity.” If “Status” is set to off, switch it on.
Now copy the “Object (principal) ID” value and save it for later.

Disable Editor Setup Routines
When Cosmos is installed, it needs to create the database and storage objects necessary for it to work. Disabling this not only hardens your security, but it is also required if switching to password-less connections. Moreover, it speeds up Cosmos startup time.
Using the Azure Portal, open the “Environment variables” for the editor App Service. Edit the variable “CosmosAllowSetup” and set it to “false”.
Stop and start your Editor App Service.
Publisher Web App Object ID
Using the Azure Portal, navigate back to your Resource Group. Now select the “publisher” web app. Like with the “editor,” navigate to “Settings” then “Identity." Make sure Status is switched on.
Now copy it's “Object (principal) ID” and save it for later.
Information Gathered
Before going further, make sure you have these four items of information ready:
- Resource Group name
- Azure Cosmos DB account name
- The Editor Object ID
- The Publisher Object ID
Azure Storage Configuration
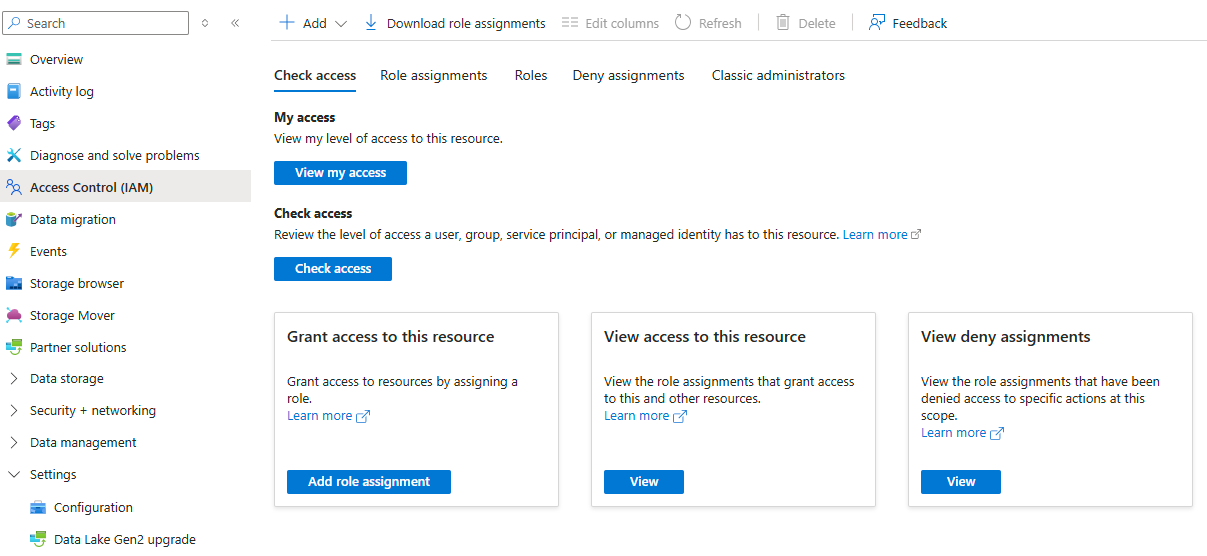
Using the Azure Portal, open your storage account and select “Access Control (IAM)” on the left column.

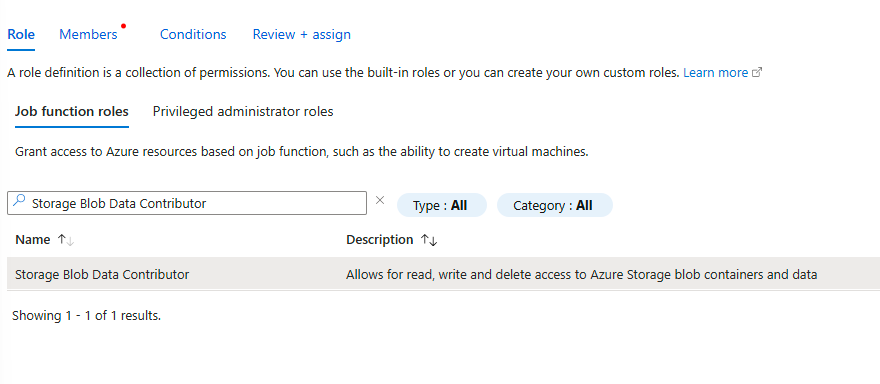
Then click “Add” and choose “Role Assignment.” Then, under “Job function roles” find the role called “Storage Blob Data Contributor.” Then select “Next” at the bottom of the page.

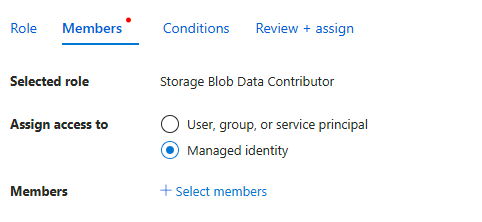
On the next dialog, select “Managed identity” then click “Select members.”

A new dialog appears. On it select the subscription for your Cosmos site is installed, then choose “App Service” under “Managed identity.”

In the name box, search for the publisher and editor web apps. Then click “Select” at the bottom of the dialog and this will return you to the “Add role assignment” blade. At the bottom click “Review + assign.”
Change the Storage Connection Strings
Step 1. Using the Azure Portal, navigate to the Resource Group where Cosmos is installed and click on the “publisher” App Service. Under “Settings” click on “Environment variables.”

Step 2. Click on “AzureBlobStorageConnectionString” and edit the value by replacing your key with this: “AccessToken”. This tells Cosmos to connect to the storage account using password-less authentication. Your connection string should now look something like this:

Note “AccountKey” now is set to “AccessToken”.
Step 3. Stop your publisher, wait a several seconds, then start it again to make sure it runs fine.
Step 4. Repeat steps 1 through 3 for the Editor App Service.
Cosmos DB Password-less Connection Setup
Setting up a password-less connection to Cosmos DB currently requires some manual effort, as it cannot be fully accomplished through the Azure Portal. Instead, it involves using a command-line interface. To simplify the process, we have developed a shell script for you to execute. Please download the file using the link provided below.
Download the Azure CLI Script
Unfortunately, this next step cannot be done through the Azure Portal. It has to be done using a command window. To make life easier, we have created a shell script that you can run. Click on the link below to download the file.
Open a Cloud Shell and Upload Script
Start by opening a “Cloud Shell.” At the top of the Azure Portal window is a toolbar. Find the Cloud Shell icon and click on it. The icon looks like this:
![]()
This will open a window at the bottom of the Portal that looks like this:

Note: If your window looks blue, chances are you are in a PowerShell window. Click “Switch to Bash” to open the window we need.
From the shell menu, choose “Manage files” then click “Upload.” Navigate to the script file and upload it. Upon finishing you should see the following popup:

Note: The destination will likely be different than what is shown here.
Run the Script
Now run the script like this
![]()
You will be asked to provide the four pieces of information. Once the script finished, it would reveal a JSON object confirming the role access has been set.
You can now close the Cloud Shell window.
Change the Editor and Publisher Connection Strings
Now we need to let both the Editor and Publisher web apps know they should connect using their “managed identities.”
Using the Azure Portal, navigate to the Resource Group where your Cosmos site is installed. Click on the “editor” web app, then under “Settings” click on “Environment Variables.” Now select “Connection strings” at the top.
Select the name “ApplicationDbContextConnection.” In the “Value” field, change the “AccountKey” to “AccessToken”. Here is an example:

Click “Apply” when done. For good measure stop the Editor web app, wait several seconds, then start it again. Open the editor app to make sure it is running OK.
Now repeat this process with the Publisher. That is, change the “AccountKey” of the connection string value to “AccessToken.” Save the value, then restart the publisher app.